

Introduction to this miniseries
A while ago, I wrote an article about speedrunning one of my most treasured childhood games. One of my yearly traditions is playing through this game and ever since last year, I wanted to have a new challenge. That challenge I found in speedrunning the game, and now when I’m playing the game, I try to challenge myself to try to beat my PB. In this miniseries, I’m going to talk about the current route, tips, and tricks of the Game Boy Color speedrun of this game. So, let’s grab our hat and whip and let’s dive right into the first level… again? Well, yes. It’ll soon become clear. Also, feel free to leave a comment down below with your thoughts and/or opinions on this article, the content, the game and/or the route.
Introduction to All Treasures
In the first part, linked higher, of this miniseries… I talked about the Any% route. Basically, the goal in the Any% category is to finish the level as quickly as possible. Now, there is another category we have and that’s “All Treasures”.
So, in each level of this game, 10 treasures are hidden. The Game Boy Color version is an exception to that, since it has two levels with no treasures. This exception doesn’t even apply to the PC nor the N64 version.
The treasures are meant to buy supplies at the “IQ store” in between levels. In the PC & N64 version, you can buy more varied health items and ammo but in the GBC (Game Boy Color) version, you can only buy either a health kit or a poison kit. And you can have a max stock of 5, which is also different compared to the PC & N64 version.
Now, all treasures is a tricky run to do. Since, in the GBC version, you need to play close to perfection if you want to unlock the final “secret” level Peru. In a full game all treasures run you can choose between two categories. You either go for “All Treasures (No Peru)” or “2055 IQ”.
The tricky thing about “2055 IQ” is that you basically can’t close to anything, or you won’t have enough points to go to the Peru level. And in the run, you aren’t allowed to cheat and after beating the game enter the level code and skip the challenge. But, the tricky thing is that some levels require you to use a health pack for the quickest route. It’s a puzzle I currently haven’t attempted and plan to do one day.
But, I’ll focus on full game runs in their separate article. For now, let’s focus on Individual Levels Speedruns or ILS for short. So, how is the current route of the “All Treasures” of Canyonlands? Let’s explore!
The category rules as of writing this article:
Link to Speedrun.com page
The current world record at the time of writing is owned by me who ran this level in 4 minutes and 41 seconds on April 17th 2022.
The previous records I had were: 5m25, 4m58, 4m53.
Feel free to follow along while waiting the run.
Note: in this article I talk about time marks of the run. Since there is a failed run in the upload, the video time doesn’t match the run time. I’m sorry about that.
Note 2: when I say “current record”, I obviously mean my current record at the time of writing this article. So, I hope to clears up confusion when this record is beaten and/or improved by me or someone else.
The run explored
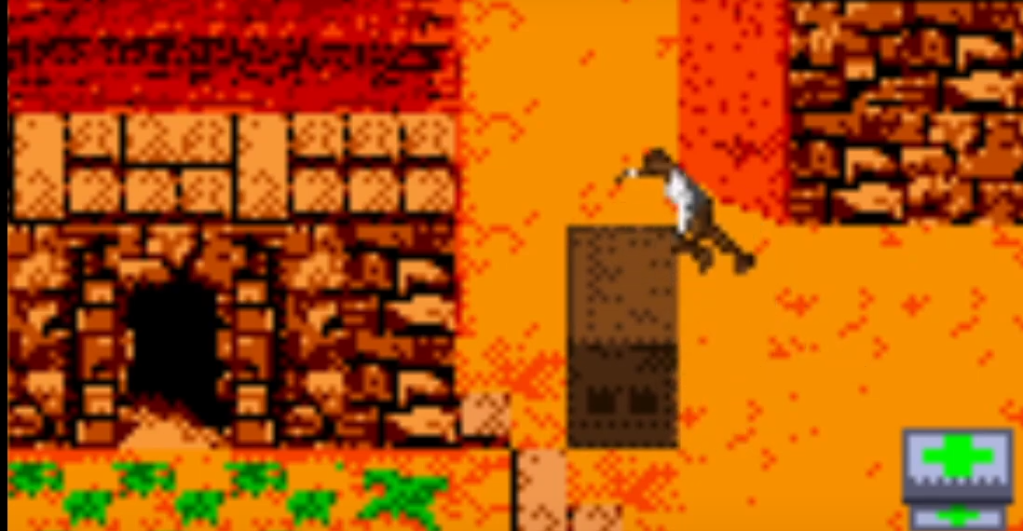
So, unlike the Any% route… We avoid the ladder snipe down directly. Since this snipe would make 4 out of the 10 treasures impossible to collect. So, we go left.

Now, the movement of this scorpion on the other platform is an RNG fest. In most cases, if you hug the upper wall, you can avoid it without any problem. When I get bitten by the scorpion, I reset right away. The lost health from the poison makes gathering the first treasures way more risky.
So, the sequence of events here is:
- Jump over the safe pit
- Huge the uppermost wall and go left
- Jump over the unsafe pit
- Ready Indy’s whip by mashing select twice while running left
- Jump at the last second, so you jump over the waterfall.

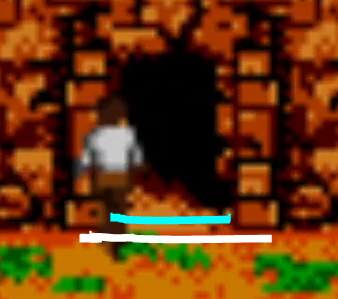
If you do this sequence perfectly, you’ll be right in place to whip over the gap. Yet, this is easier said than done. The sequence of inputs I just described are close to frame perfect in some places. All these actions take place in give or take two or three seconds. When I don’t reach the other end and climbing the ladder when the timer hits 11 seconds, I know I can reset the run.

Why do I see that as a reset point? Well, because I know myself. If I allow my timer to be higher, I’ll go in a slight panic mode since I feel like I’m unable to beat my record and make too many silly mistakes sometimes costing me the whole run. So, it’s to keep myself calm. Anyway, you might have noticed that yellow coin looking thing in the 2nd screenshot. That’s one of the four treasures here. That’s the treasure you should get last. If you take this as your first treasure, you’ll lose a lot of time since there is no easy way to get back to the area with the first three treasures, and you’ll have to do the whip swing again which costs around a second or two.
Oh yes, you can save some time if you jump up right after swinging with the whip. This saves half a second in climbing, but it’s tricky to do, and a bad jump can land you either lower or just at the bottom of the ladder losing the time save. But, as far as I know, there is no real danger in trying to attempt this trick.
Now, after you climbed up… I highly suggest that you press select once so Indy’s hand is the tool you are using. Now, there is something you need to know about doors in this game.
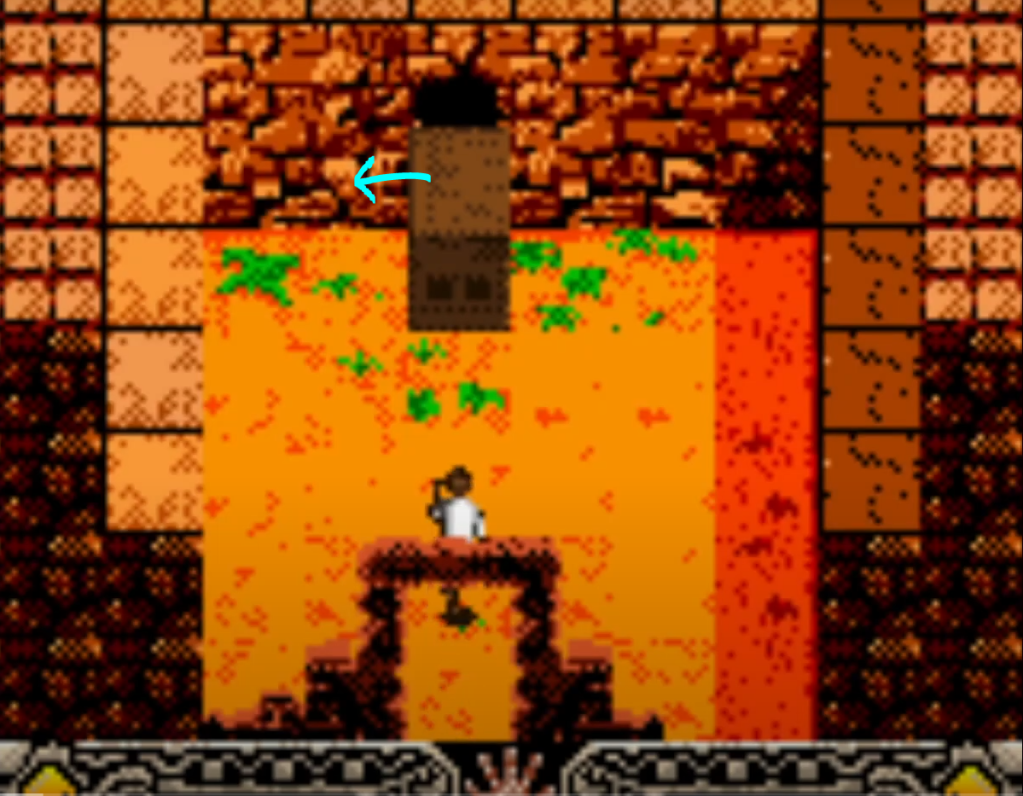
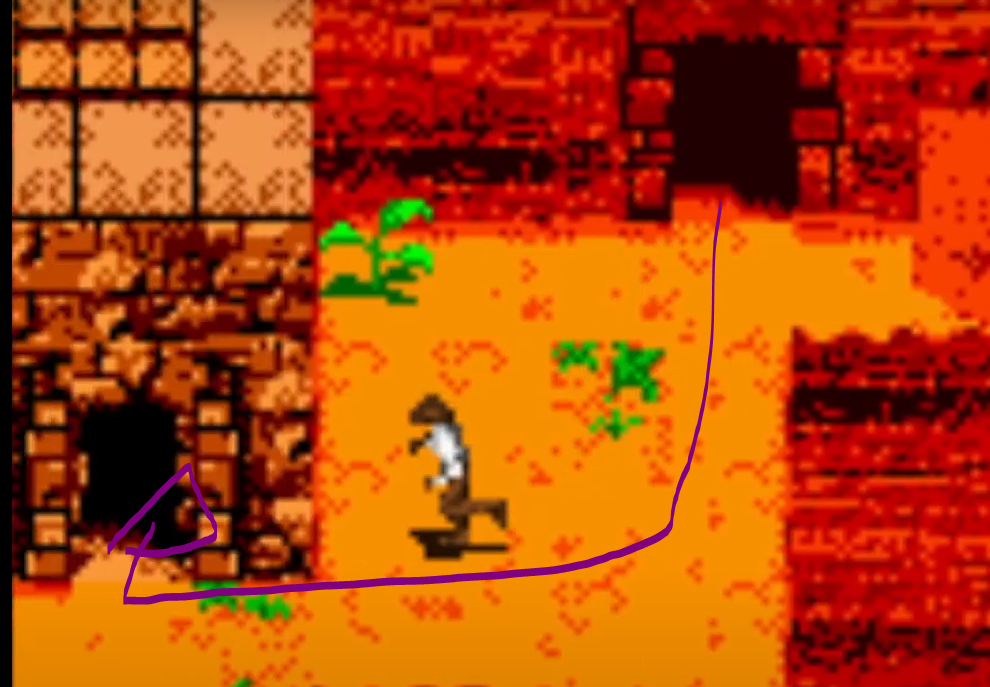
I enter the treasure room in my current world record around 16-17 seconds. If you watch the run, you might notice that Indy looks like he is entering the wall.
Now, here is the thing about doors in this game. The hitboxes are wider than they visually appear. So, in other words, visually it looks like you can enter where the aqua line is. Yet, you can enter where I drew the white line.
Trying to enter a door as soon as possible saves a few frames, but these add up quickly in this level.
Now, this is a moment where you can make a choice. I haven’t tested it which route is faster. The first choice is that you go for the two treasures above and the second choice is that you go for the treasure at the bottom. Both have their dangers but all three need to be collected.
The sequence of collecting these three depend on me if I’m able to enter the door behind the stone you can push. Usually, I go to the right of the stone and push it to the left while hugging the wall. I let go of left at the end of the push animation to push up and usually Indy goes in the door right away.
Yet, in my current world record run I decided to do things a bit different. I decided to jump up right away and get the two treasures on top. Without pushing the stone at all. Which is a dangerous and risky move.

Usually, when you push the block to the left… You can jump up on the left side and grab the red jewel. After that, it’s easy to avoid the bastard of an enemy and grab the green jewel. Oh, jump over those tiles with the crack in them. Since, if Indy is full on that tile… He’ll fall down below in the water without any way out. Loosing your chance to pick up the treasures in this area.
If you go up right away, the chances of that enemy poising Indy is a lot higher. But if you go up, you’ll need to first go for the green jewel. Since going for the red first will make you a better target for the enemy and corner jumps are quite tricky, and I landed so many times on those unstable tiles during attempts, it’s not funny anymore. Also, I find that when you drop down after the red jewel, it’s easier to line Indy up to push the stone without having to re-orient him.
So, let’s push the stone, so we can pick up the final treasure in this treasure room. After going up, there is a very ideal way to move in this room to have the fastest time.


The blue and purple lines show the way towards and back from the treasure. Depending on the movement of the scorpion, it’s easier to line yourself up. While you can walk pretty close to the water… It’s a reset when you fall in. Since, you lost your chance to pick up two treasures now. In my current record, I chose to go down & around since the scorpion was a bit too close to the ideal route and I didn’t want to risk it.

And also, it’s best that you pick up the treasure on the first few frames on your way back. Since, you’ll be able to keep your momentum which saves a few frames. You can see how I do my controller inputs for this around the 37 second mark in the run.
On my way back, I noticed that the scorpion was down below, so I was able to get closer to the edge with the water. But, it’s possible to get even closer, but remember… This is quite risky since falling into the water makes you unable to obtain certain treasures. Since, unlike the PC/N64 version, there is no way to get back up here and obtain these treasures. Even in casual play.
So, around the 48-second mark… I have left the treasure room. With a bit better movement and not being poisoned by the enemy I think I can shave a second off here. Yet, it would be extremely tricky to do and risky. After leaving the treasure room, it’s time to go to the right to go down, jump over the waterfall and pick up the coins we saw earlier to pick up the final out of 4 treasures on top here.

Now, comes something risky. After collecting the coins, you’ll need to jump down and try to line Indy up the closest edge of the waterfall. The goal is to land in the pool down below closest to the exit point. But, when you jump down too early… You might let Indy miss the pool and die. Jump too late, and you lose a second or two in the water since Indy swims so slow in this game. My drop/jump around the 53-second mark isn’t perfect. I was too center. I had better but I also had worse. After dropping into the water, exit it as soon as you can at the top right-hand side.
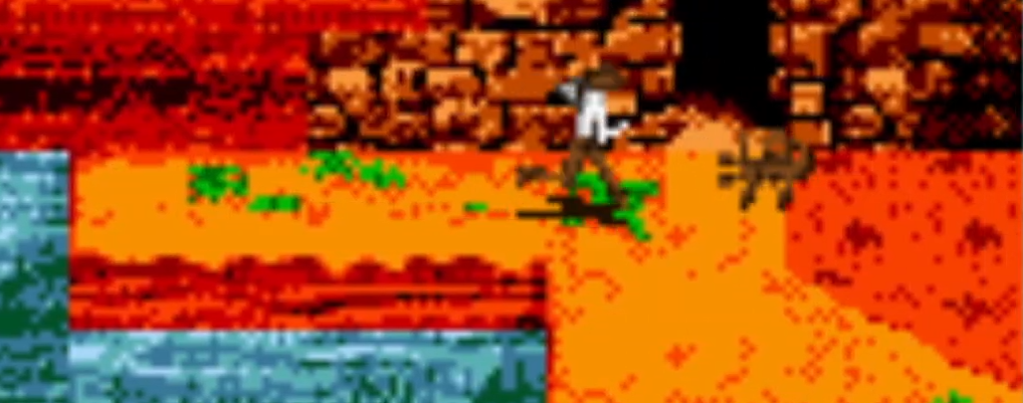
After exiting the water, you might notice that enemy and want to jump over or away from it. Don’t. Since, it’s somewhat easy to avoid and you are risking loosing time by either dropping back into the water or jumping too early/late and getting poisoned. Just move a bit down around the spot in the screenshot above. I actually moved down perfectly in my current record. Since, you need to avoid a wall and go into the door a bit behind it. This is what you see me do around the 1 minute 4 seconds mark.

Now we enter a “puzzle” room where I hate the movement with a passion. If there is one thing I’m not too good at… that’s precise movement.
The solution to the puzzle is that you need to walk on the sun tiles in a certain sequence. First, you hit the 3rd tile counting from the left. Then, go to the first tile without walking over the second tile and just walk over the rest. So, from the left the sequence is: 2-3-1-4.
The issue here is that the hitboxes of these tiles are a bit off. The tops are quite sensitive and the bottoms aren’t. So, when you try and walk from tile 3 to tile 1, it’s easy to trigger tile 2 when you go overtop. Now, it’s highly recommended that you go overtop since the treasurees will drop from the totempole you see on top this room. So, yeah, this room is tricky and might require some “training”.
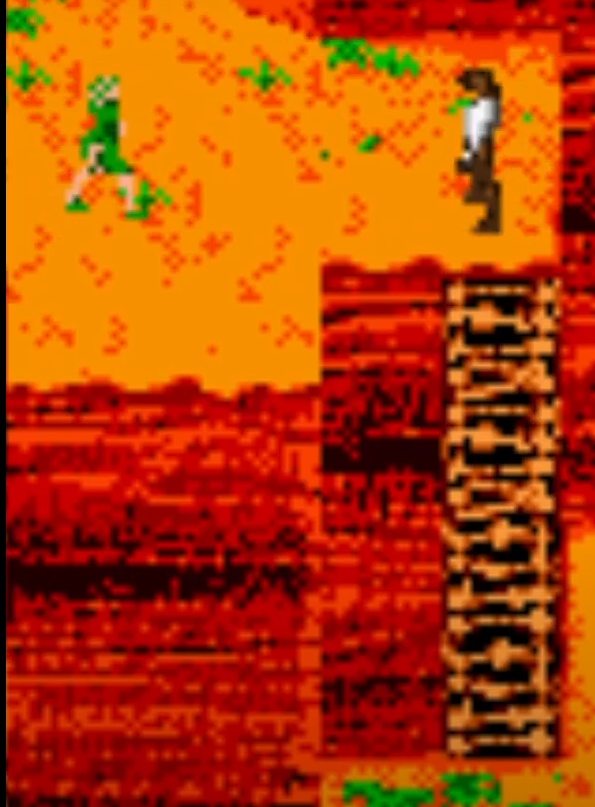
Now, after the treasures drop: go for the left most treasure first! Since, the right most treasure is perfectly in line with the door. Mixing these up might cost you a few frames. After exiting this puzzle room, you go to the right. There is another stone which needs to be pushed down once and then left once. It’s possible to jump from there to ledge above the door. Yet, I find it safer and more consitent to push it left twice so the gap is only one block. For some reason, I have a hard time making those two block jumps from a lower to a higher platform. While it is possible as you’ll see in the next level.
Now, hug the wall and jump at the last second as shown in the screenshot below here. If you do it right, you’ll grab the ladder and skip a part of the climbing animation. This is one of the minor optimisations you can do to save a few frames. Yet, be careful with trying this one. If you push Indy too much to the left, you will not grab the ladder and miss the platform and have to go back on the ledge.

After this, it’s a bit of climbing we need to do. Jump earlier to the ladder to skip climbing it when you can. This is an easy trick to master which can shave so much time off your runs. After the 2nd ladder, be careful since there is a scorpion quite close to the part where you accend from the ladder and being poisoned there is real easy. That’s why I usually jump forwards once to avoid that and get closer to the door.
Be sure you are at least more half health now since there are some parts coming up that will require you to be able to tank/take some damage. If needed, there is a herb in the hallway. Herbs are faster to heal compared to going into the menu, going to a medkit and then going out of the menu. You see me pick up the one outside of the hallway around the 2 minute 2 seconds mark.

There is a reason why I take out the pistol around the 2 minute 18 seconds mark. Because there are some enemies coming up which are difficult to avoid when you exit a door. I rather shoot them to be safe. Now, it’s possible to save a bit of time to do a corner jump from the ladder platform as shown with the purple line. But, it’s a tricky one and might cause you to loose your run. Corner jumps are in general not easy in this game. Usually, I take the safe route wit the lightblue line. Which looses a few frames, but it’s safer and more consistent.
Now, after this, you can make another choice. Go right into the closest door or go for another treasure. There are 4 left we still need to get and it doesn’t really matter which one you go for first. I usually go for the bottom one last. If you want to go for the bottom one first, be my guest. This will be the last treasure talked about in this article.
So, I go into the closest door right after killing that enemy. In that case, don’t put your revolver away. Since, scorpions have this nasty “”feature”” where they can poison you during the whipping across animation. So, shoot the scorpion dead when you enter the room and go left to whip across. Remember to use select to switch between your tools to save time. Opening & closing the menu adds so much additional time.

Now, don’t make the same mistake as me here. When you need to whip across, you shouldn’t be right at the edge since Indy’ll whip in front of him then. And this’ll cost you a second or so. Stand a bit more back. When you are swinging across, you might notice the next treasure.

If you pick it up now, it’s fine. If you want to pick it up on your way back… It’s fine as well. The time to pick up this treasure is the same either way. In my current record, I chose to pick it up after the two treasures after whipping across again. So, don’t forget to pick this one up if you skip it now. But, after whipping across… Shoot the enemy, for a similar reason as before. Now, after that, you’ll see two doors at the bottom.

You can choose the sequence of the two here. Since I have the gun equiped, I prefer the left door first. So, I’ll explain the right part later.
The gun is equiped and we go in the left door. The gun is needed since there is a nasty troll scorpion that you will encouter right after exiting the hallway after the door. Either move to the right, right away, or shoot it. If you shot it without getting poisoned, count yourself lucky since that will make the upcoming part way easier.
Now, the treasure is at the bottom of this section. Drop down as quickly as you can without taking too much damage. Since, you’ll need the health to tank scorpion poison since they are so nastly placed. Be sure to switch back to the hand to pick up the treasure box. I started my decent on the 2 minutes 47 seconds mark. The decent was quite clean. But, my ascend. Oh boy. From 2 minutes 56 seconds you see some messy jumping and me getting screwed over by scorpion poison twice. It’s something to costs me so much time and doing the ascend propely is somewhat stressful.
So, after the hallway, equip your gun again to kill the newly spawned scorpion and now, it’s time to explain the right door. For that door, be sure you have the hand equipped. Since, right after exiting the door, you’ll have to drop down.

If you drop down on the corner edge of the platform, you reach the hitbox when Indy is in that landing animation and when you mash “A”, you’ll pick up the treasure. Go left and swap to the whip to swing across.

Jump across the death pit and be VERY careful trying to do a ladder jump here. It might save you a few frames into the climbing animation but missing the ladder means certain doom and dead run. I rarely to never risk it here since I desipe loosing a run to a silly mistake near the end of the run.
After the ladder, go to the right, up and over jump across and get back into the door. After that, swing across the two gaps and get into the door again. Now, we come back to one of the choice spots. Since I started to talk about the “top” door first, let’s go down and to the left now for the final treasure.
In here, there is the final treasure of this level. Be careful to not step on the cracked tiles since they drop you down lower in the level. And when you don’t have enough health, they are deadly.
Now, it’s time to go to the right the whole way after exiting this door. Go towards the ladder we climbing up, where I said you could save time with that risky corner jump. And now go to the right instead of the left. And then, it’s basically the Any% run route after the ladder snipe. Be careful, since now there is an extra scorpion for you to avoid. But, I use that one to jump at the right time to speed up the first long climb.
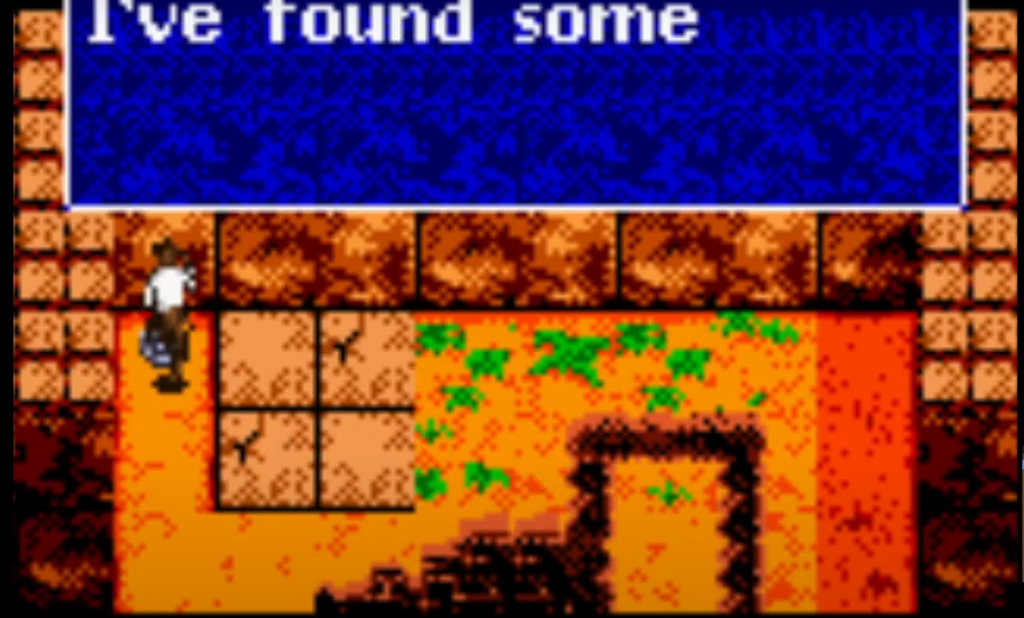
My ending was a bit messy but hey. That means more time can be shaved off this run. Since we played the full level, we see Sophia actually walk up to Indy. When you do the ladder snipe of the Any% run, Sophia won’t show up but the textbox will play.
Don’t forget to push “A” to skip the textbox faster. And yeah, that’s the whole route.
Looking back on this run, I’m certain that a run of 4 minutes 38 seconds is totally possible. Especially since I saw a lot of potential improvement while looking through this run to write this article.
Now, this level has one of the biggest differences between the Any % route and the All Treasures route. A 4-minute difference even.
After writing this article, I’m quite hyped to try and beat my record. So, I’m going to try and do that during my summer holidays. Keep an eye on my Twitter since I’ll post there when I have beaten my time.
But oh boy, was this a long article yet a fun one to write. Next time in this miniseries, I’m going to take a look at the second level Babylon. Maybe I might write only one article about that level since most of these treasures aren’t too far off the main route for Any%, yet they do cost a lot of time to grab.
And with that said, I hope you enjoyed reading this article as much as I enjoyed writing it. I hope to be able to welcome you in another article and until then, have a great rest of your day and take care.

2 thoughts on “Speedrunning Indiana Jones and the Infernal Machine GBC – Level 1 – Canyonlands (Part 2)”