Speedrunning Indiana Jones and the Infernal Machine GBC – Level 5 – Shambala Sanctuary

Level 3+4 speedrun article

While my focus has shifted away a bit from speedrunning, I still sometimes try to beat the records for the Game Boy Color version of Indiana Jones and the Infernal Machine. Now, since we got a new game announced, called Indiana Jones and the Great Circle… I honestly think it’s a great moment to continue that series on my blog, where I explain the starts and fastest ways according to me to beat the game. I want to say as a disclaimer that I’m talking about the current level speedrun records. The_Kovic made an awesome TAS of this game, I mainly want to talk about the current human speedrun. So, let’s dive right into it. Feel free to leave your questions, comments and/or thoughts on this article in the comment section down below.

Current records

One term I’ll explain is something I talked about in the introduction, I talked about “TAS of this game”. TAS stands for Tool Assisted Speedrun. This means that it’s created using tools like save states, slowdown amongst various others. Also, in these runs we can control the input to the frame. Basically, this means that we get a look if the run is perfected.

Now, comparing the route of the TAS through the game and the route of the current record, we basically don’t see a lot of differences. The biggest difference is that the movement is a lot cleaner and a lot of extremely risky jumps and tricks are preformed. From watching the video, the current TAS is, give or take 7 minutes 5 seconds.

Currently, the record for Shambala is 7 minutes 51 seconds, set by myself on December 10th 2023. I know it can go lower since I have already done it. But, due to me messing up my OBS settings, the video is anything but watchable. I decided to not upload the video, but I know it’s possible. Currently, my personal best is 7 minutes 40 seconds. I’ll explain how to save time in this article, since I even think it’s humanly possible to go even below that by a tiny bit.

On January 22nd, 2022 I also set the current record for all treasures in this level. The current record is 8 minutes and 57 seconds. Now, this run doesn’t use all the most optimal jumps and tricks. This is something that can go lower. In the guide, everything that’s in cursive is additional information for the all treasures route.

The route

The level starts with a little dialogue box that Indy needs to hurry up because the Soviets aren’t too far behind. In the PC version, the Soviets only turn up after you pick up a certain key. In the Game Boy Color version, they are already there. If you want to run this level, I highly advise you to learn where the 5 guards are in this level.

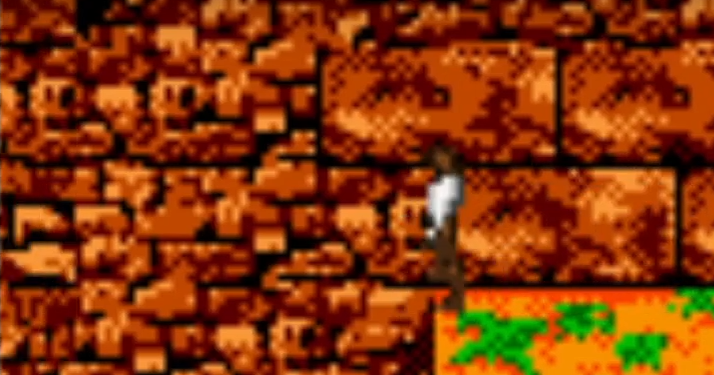
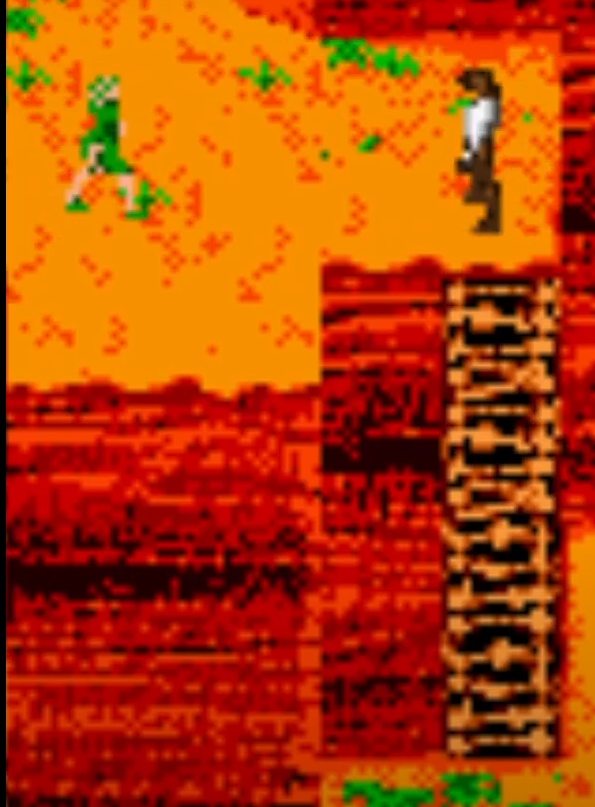
I had several runs where I lost time due to bad guard movement RNG. The first guard is when you move up. Just run past this guard to go to the next screen. Yet, if you are doing all treasures, the first treasure is to the left here. So, pick that up first. Usually, I pick up that red gem while at the right most edge of the texture and already turned to the right to run back to run up.

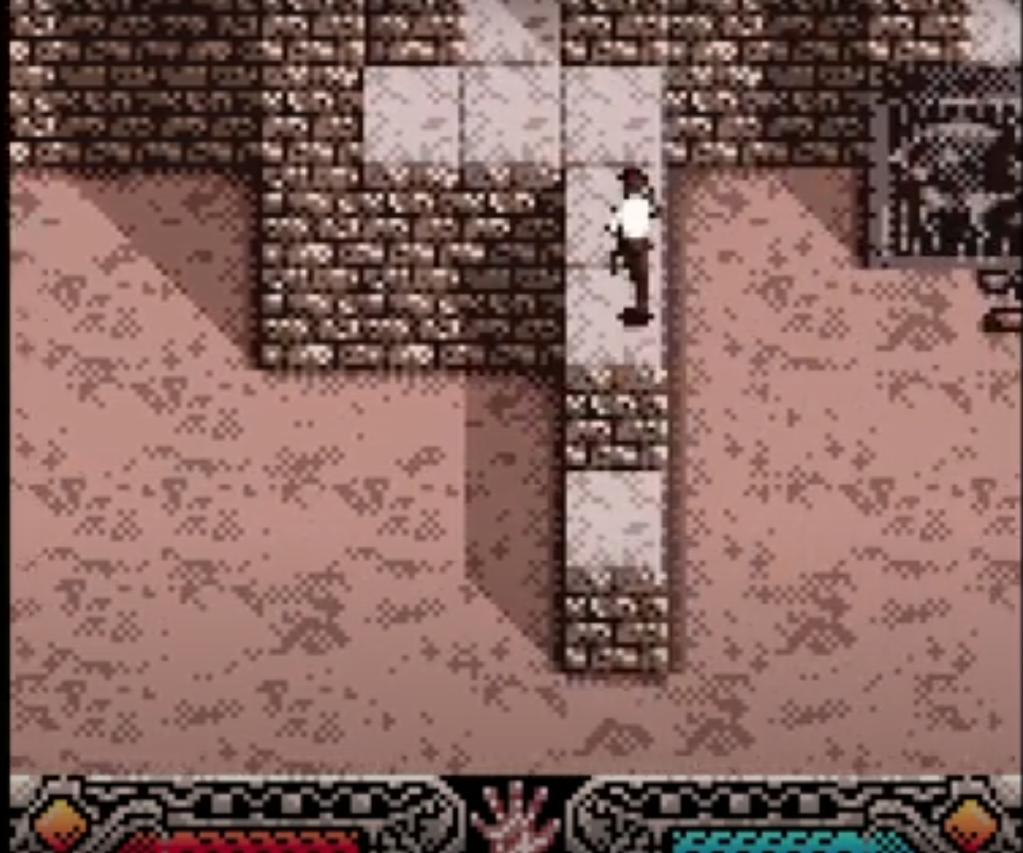
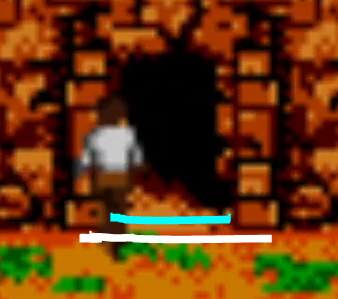
Keep running up towards the building, which is actually Shambala. It doesn’t really matter where Indy stands to open the door, since the game forces you in the middle of the entrance when you enter it. When you enter, you’ll notice a block to the left. Don’t make the same mistake I quite often make. It’s faster to go to the right block and move that one to the side first. So, move the block to the side and press the button that gets revealed. Do it for the right and left side, in that order.

After that, move upwards on the left side of this room towards two doors. Something I do that’s different to the TAS is I press the third button before I enter the next room. The TAS presses the button when we exit from the other room. Personally, I think it doesn’t make a lot of difference timewise, maybe 2-3 seconds. The reason I directly go for the switch is that I don’t want to forget to press it. The guard is usually now facing away from Indy and walking towards the other door. The TAS route is riskier, since there is a high chance that the guard is facing towards you when exiting the other room and can get a few shots off. And those can be quite dangerous, since the TAS even finishes this level with one health point left. Anyway, for the next room, you need to take the left door.

Now, the next room has three parts to it. It also has three bricks to move, well, depending on the route you are taking. But be careful here. There are two guards roaming around in this room. RNG can really screw you over here depending on how these guards move. Now, if you take the all treasures route, you have three bricks to move. The one for the treasure is at the far left in this room. If you are confident in your jumping, it’s possible to stand on the left most edge of this block and jump up towards the green gem. If you aren’t, move it once right and then jump up towards the green gem.

Now, we take the middle section. This is a little bit to the right when you enter from the left door. You’ll see two gears moving on the wall. Move the block over once to the left. If you stand on the right most edge and face right, you’ll be able to land on the higher platform with the gear. Feel free to move it closer if you don’t feel comfortable with those edge jumps.

After you picked up the gear, move towards the right most section. Now, we do the same block pulling thing here as well. If you can, try to jump up towards the ladder. The less climbing you do, the more time you save. Climbing is really slow in this game. When you reach the top of the ladder, we see the first Ice Monster of this level. Usually, moving to the top row of tiles and jumping over it towards the door avoids damage.

Now, in the following room, we have a hallway and two higher sections. Go towards the section on the right and move the block on the top left of the platform once down and once to the left. Here I lost 4 seconds in my record because of some horrible movement. The following trick might be in my head since the TAS doesn’t do it, but I usually do it. The reason why is that it’s the most consistent way I have to make 100% the cutscene of opening the room on the left triggers without you having to move another block. And that’s not pulling the top block towards the other square but pushing it. Don’t forget that on the top right of this section there is a gold bar treasure, after pushing the block is the perfect moment to go grab it. After you push over that block, go to the bottom right of this section and pull the block towards the bottom square. The reason you need to pull is that it saves time to not have to go around the block after the cutscene. Also, practice the jump of landing in the middle of the hallway or beyond that. You’ll need that later. Now, move to the newly opened section and move towards the other top corner. There you’ll need to pick up a rod. And, if you jump a bit higher, on the next tile a set of coins. After that, leave the building. Be careful to dodge the guards and the ice enemy on your way back. If you feel extremely risky, you can save time by jumping towards the ladder in the ice enemy room to save time, but if you don’t grab the bottom pixels of the ladder it’s game over.

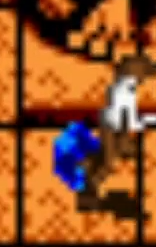
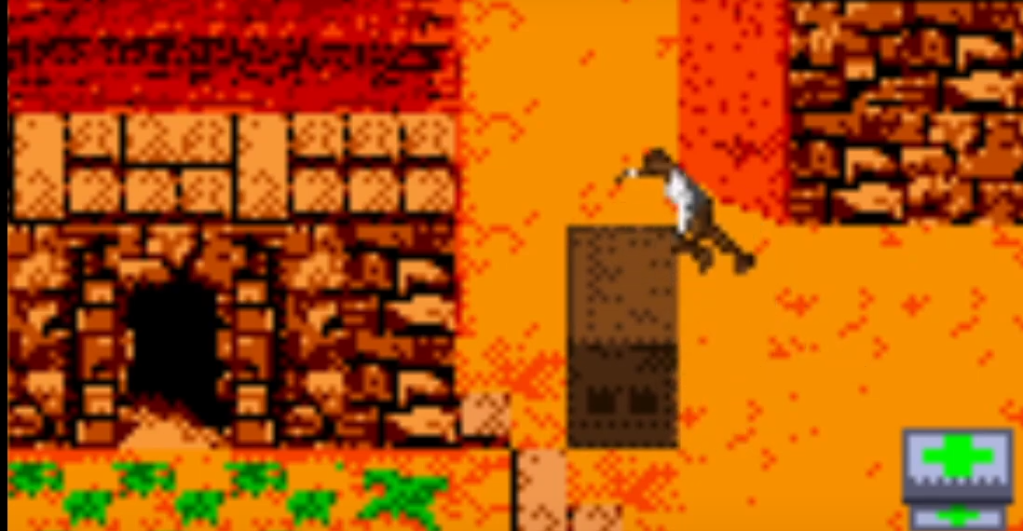
Now outside… we move to the right of the building. Now, the fastest way to arrange the boxes is moving the two stack once to the right and the one stack once towards the left. Doing this jump without loosing time is extremely tricky but would save a lot of time over pulling the blocks into the easiest configuration. It’s a lot of edge jumps here, but I have done it and it’s possible. So, jump up and towards the platform to pick up the blue gem. After that…

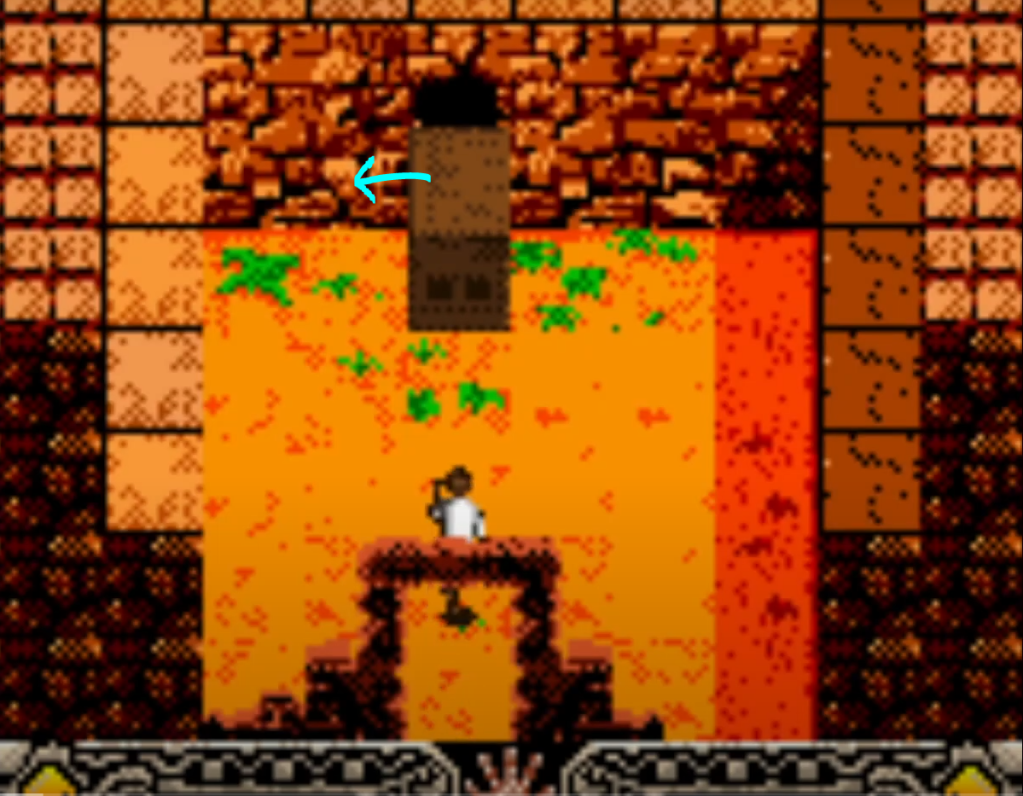
… we go left of the building. Here I lose 2-3 seconds of time in my record because of some bad movement and not grabbing the two stack box right away. The easiest and fastest way to progress is pulling the two stack box one towards the top of the screen. After that, jump on the one stack and diagonal to the right to enter the next room. After entering the room, pick up the treasure at the left. Do it now, otherwise the guard RNG will be hell. Now, we need to go in the door next to the climbable wall.

From now on, the easy part of the run is over. Now come a bunch of sections that can potentially make you lose a lot of time or just end your run outright. There is a treasure at the bottom right of this room. Pick it up first. Now, jump over the gap and move towards the broken tile at the top right of the room at the gears. While facing the gears, open your inventory and pick the ratchet. You’ll need to move to the left 4 times in your inventory and press A. This is meant to block the bell from falling back down.
Now comes one of the first sections that can cost you a lot of time. I highly advise you to practice this next section. Just take a look at the stream Klamath and I did. The idea is that you jump back and forth between the two broken tiles. The timing is extremely strict. You’ll hear a sound effect when you hit the tile in time. When you hit the tile and don’t hear the sound effect, the bell is going to fall down and you have to start over. So, try and try this bit until you are good at it. After 7, yes 7, jumps back and forth, the bell reached the correct point. Now, the camera will pull up to show the location of the bell. Whilst it’s moving down, move towards the door at the bottom left of the room. It’s possible to exit the room before the camera reaching the bottom. Since I missed this once during my record, I lost 12 seconds.

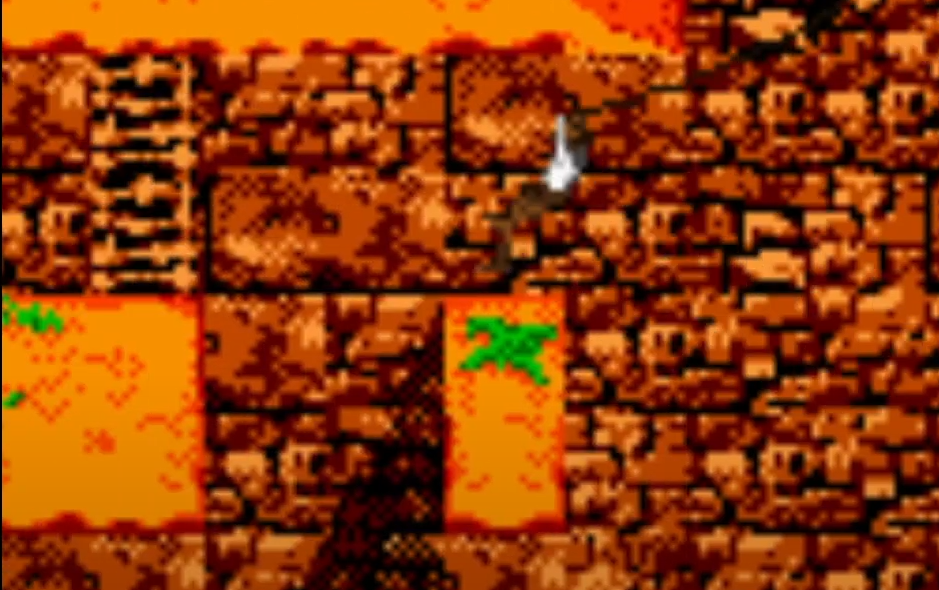
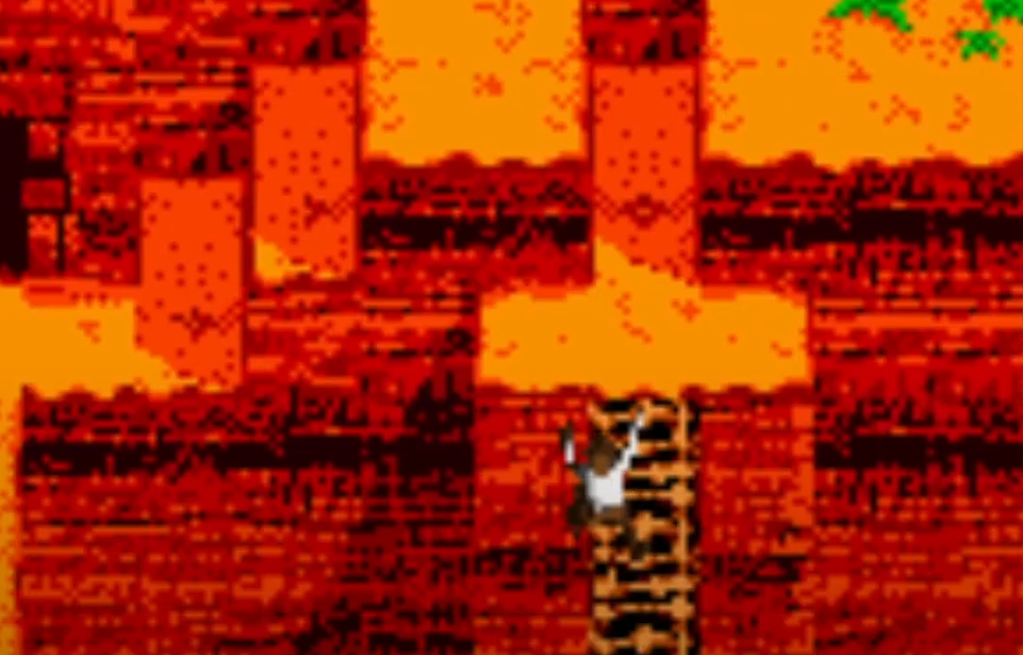
After exiting the room, a guard suddenly shows up. The fewer hits this guard does on you, the better. Yet, the space is quite tight and it’s difficult to avoid him. Now, we need to climb up the wall. Jump towards the climbable wall that’s closest towards the door we just entered the room from and climb up. Now, we do something that’s unique to the Game Boy Color. Whilst climbing up, you will have to drop towards another ladder. For the first drop, it’s fine if you move over to the left. For the second drop, climb towards the top and let yourself drop towards the right and hold up. It’s scary to do, but hold up during the fall. Otherwise it’s game over for sure. After you climbed up, go to the left and exit this room at the top left door.

Now comes to the next trick, depending on how well you execute it, you’ll save more time. The idea is that, when you enter the room… you move towards the right edge of the room. Run down and jump down give or take a tile before the edge. Let yourself fall but hold up at the right time. The idea is that we grab the long ladder a bit down there. Failing this trick is a run ender. It’s no short ladder so be careful of dropping off this ladder. Now, after you are off the ladder, move to the bottom left of this room and climb down. Or be even more risky after this ladder snipe and snipe the ladder at the bottom left like the TAS.

Now, in the next room, don’t climb the ladder down. Midway the ladder, drop down towards the gears. You’ll notice that there is a peg sticking out of the wall. Stand in front of that one and open your inventory to go trice to the right to select the gear. Now, stay on the raised platform and move towards the other side of the room. Drop down to take the silver bar and jump up towards the raised platform. Those ice guardians are quite painful and hurt a lot. The more damage you take, the higher the risk you’ll loose your run. Now, jump towards the ladder from a little bit before the last tile to save the most climbing time.

Now, the clock starts moving. Move as quick as you can towards the button and here comes something I’m still unsure about the fastest way to go forward is. I know you can totally skip the cutscene of the camera moving up to show the statue turning like the_Kovic does in the TAS. Yet, in order to do this, you’ll need to preform some tricky jumps perfectly. It does save a lot of time, yet almost five minutes into an any % run and after preforming various edge corner jumps, that annoying bell part… I find the TAS strategy at the moment of writing too risky. I linked to the TAS a bit higher if you want to see how the TAS does it, but I’ll explain how I do it. It costs 10-15 seconds, but it’s a way safer strategy in my honest opinion. Sadly, using the glitch that Indy can move after the button press for a little while isn’t possible, so that costs us an additional second.

So, press the button twice and watch the cutscene of the camera moving up to show the statue moving. While the camera is moving down, we regain control of Indy. Depending on how confident you are with your jumps and your nerves at this point… Press the button between 7 to 9 times. I personally prefer 9 times. It gives you some room for error. The red brick-thing will be either at 9, 10 or 11.

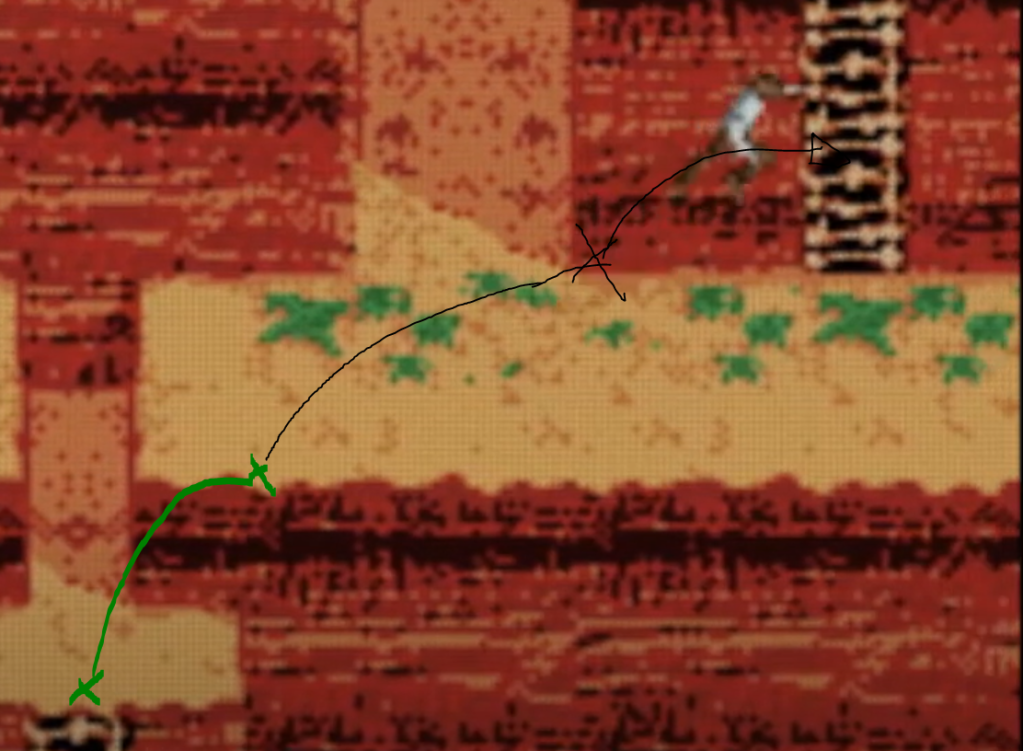
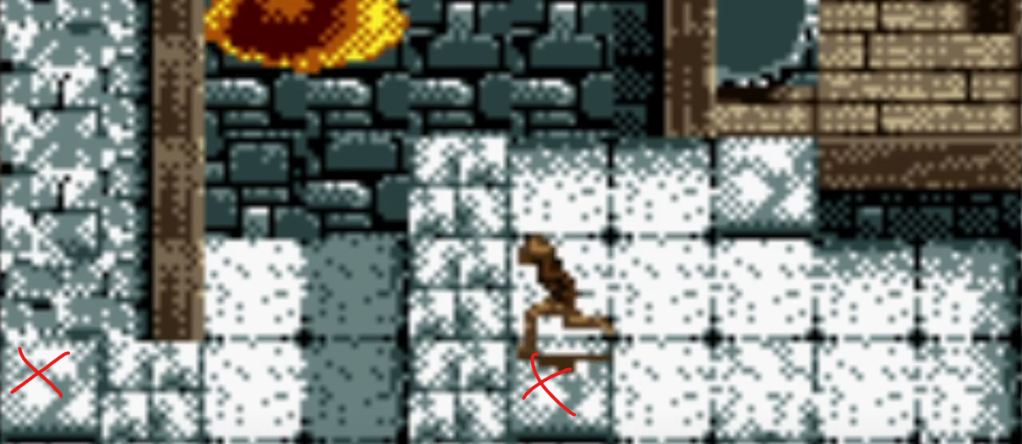
Now, comes the annoying part. We need to go back up. Go towards the raised platform you notice at the middle top of your screen and jump up and enter the door. You’ll notice we exit at the platform at the bottom of the ladder we sniped earlier. Climb up to the top of it. Now, if you want to be extremely risky, you can do what’s known as a corner jump.

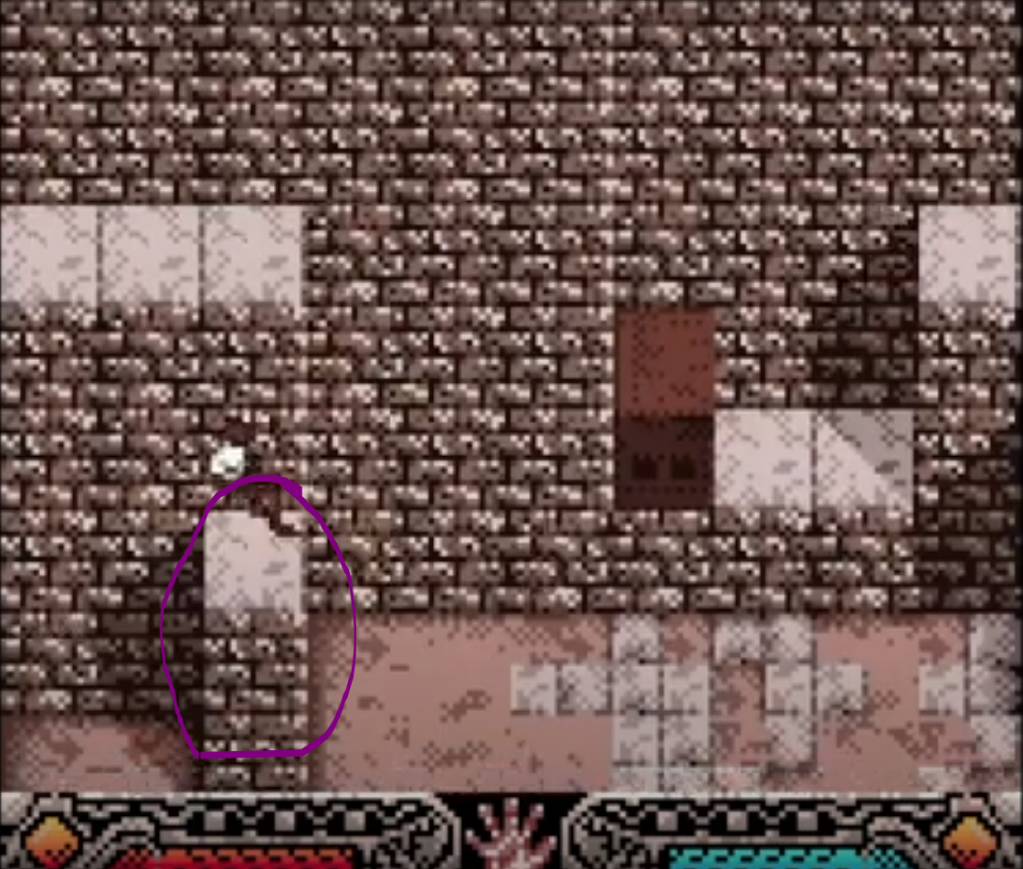
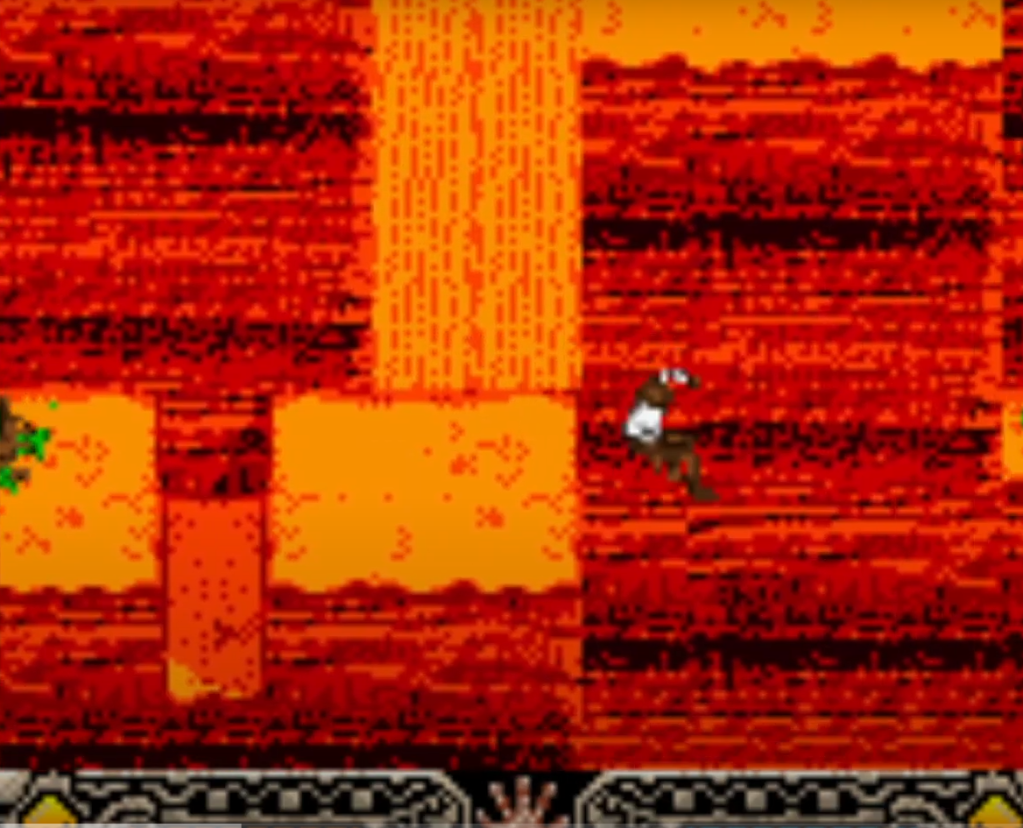
It’s an extremely risky jump that can save you a lot of time and is essential when you pressed the button at the bottom 6 or 7 times. The idea is that you jump from where the X is after you climbed up the ladder and hold left up in the air to land where the other x is. Now, missing this jump means a game over. So, you risk it all here. I was around 5 minutes 18 seconds in my record run and as you can see from the screenshot, I walked into the door after the ladder. Now, we need to do a corner jump to the raised platform at the left here. It’s quite the precise jump so that’s why I was only able to do it after my third attempt in my run. Enter the door and jump towards the ladder after exiting the door. Be careful to not miss that ladder, since if you don’t land on that raised platform, it’s an instant game over.

Now, after climbing up that ladder, go towards the button at the top right of this room. As soon as the statue starts spinning, press it. You’ll watch a lengthy cutscene of the statue going on the rails towards the bell. You will see something drop down from the bell and see the door you entered this room from close. This will take +/- 30 seconds.

Let me also tell you, if you don’t have a spinning statue in a few seconds, you best reset your run. Since now the clock needs to reach the red peg and that’s too big of a time waste.

But we are in the final strech of the level. Now, don’t loose focus in these 30 seconds since we are not done quite yet. Run towards the left and jump towards the ladder to save up on some climbing time.

When you reach the top of the ladder, and grab the 9th treasure at the top left of this room, we need to dance around the ice guardian to reach the climbable wall that’s just outside of the shadow part of this section. Now, when you enter the next screen, drop down at the right from the climbable wall.

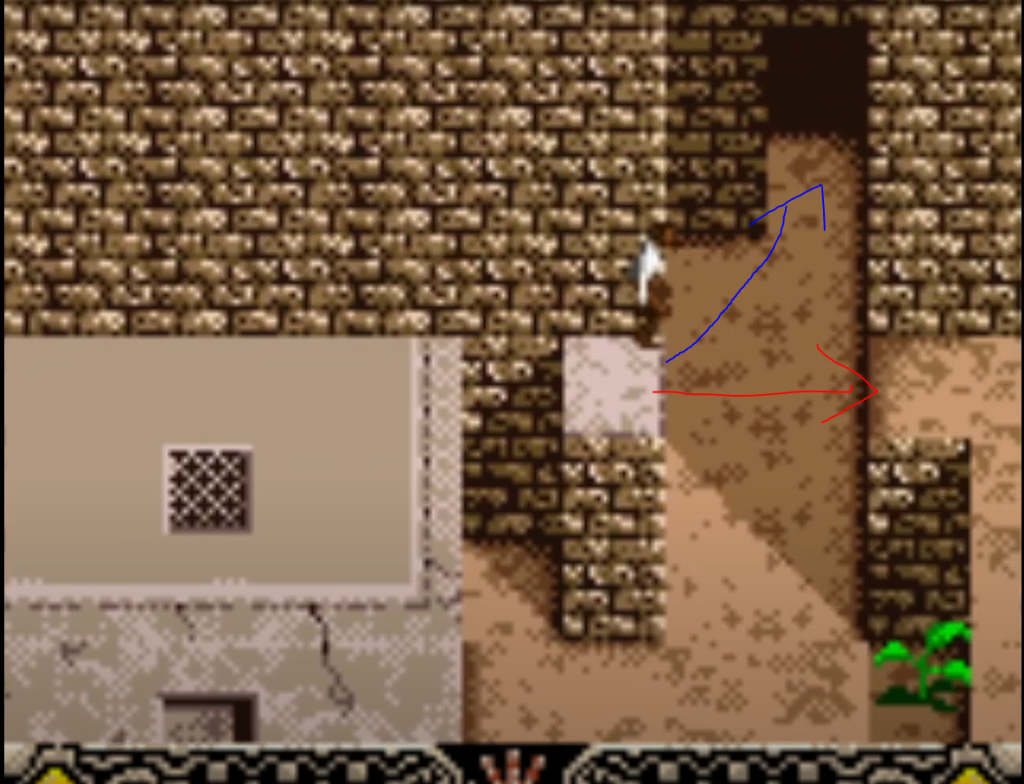
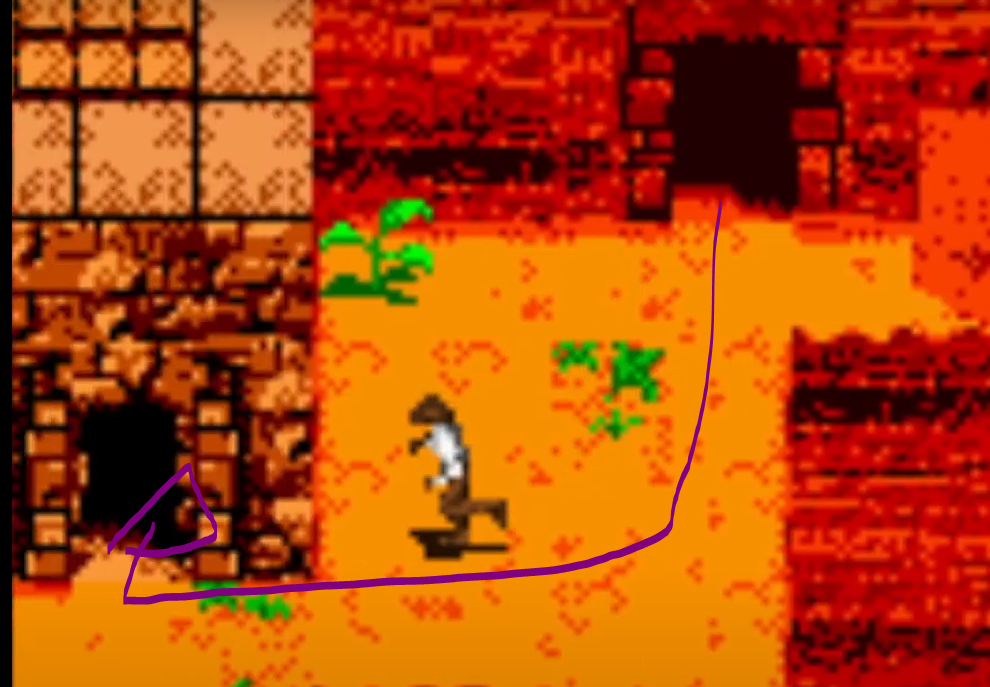
Now comes the final life or die trick of this run. We need to drop down somewhere along the purple titles. The best way is where I have drawn a red line. Hold up to grab the climbable wall, but not too soon to not grab it at the top. Since climbing is slow in this game and there is still that pesky guard at the bottom. The idea is to grab the climbable wall as low as possible so you can drop down without loosing too much health and not loose too much health to the guard having some free shots at you. You’ll need to face that guard twice, since you need to enter that annoying jumping room to pick up the seed that dropped down. Now, you can save a little bit of time since the hitbox of the seed is bigger then you think. If you stand on the edge of the tile, you can pick it up.

Exit the room and make your way to the building. If you have health enough, drop down from the ledge outside. Once inside the building, move towards the blue flower tile and standing in front of the water… open your inventory and move three times to the right to pick the seed. Now, it’ll turn into a flower. Now, go up towards the right side of the room to enter the right door. After that, go to the right section and climb up the ladder. Here some luck will be involved to avoid the guard. When you climbed up the ladder, dodge the ice guardian again and now you have the run in the bag. If you don’t make stupid movement mistakes… you’ll be able to finish the run in just a few seconds.

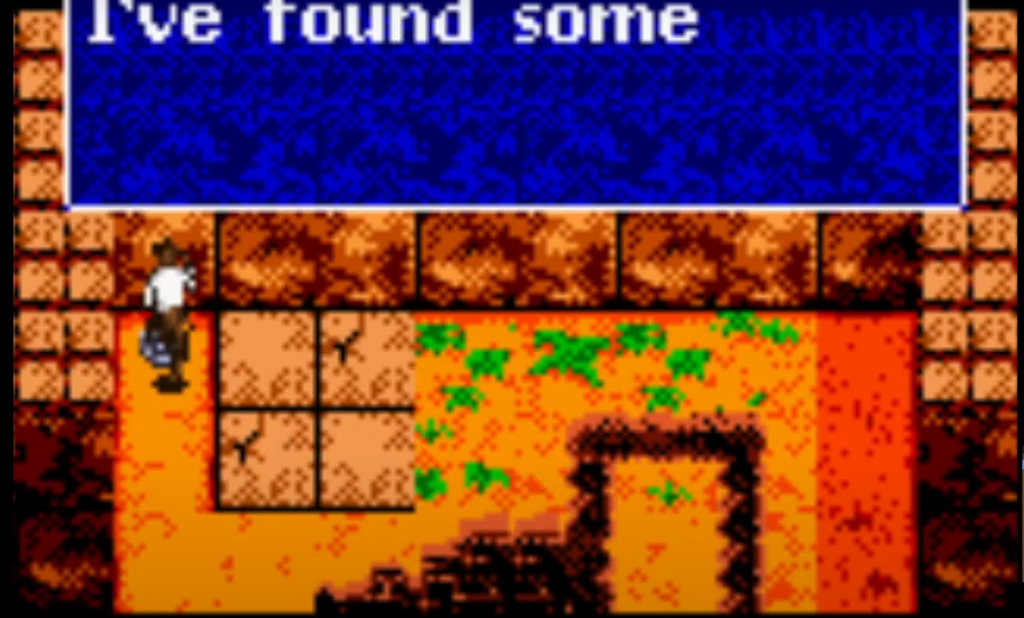
Now, move down the hallway we all know to well into the final room. Pick up the final treasure at the bottom right of this room before you do the final “puzzle”. Now, when you stand in front of the fire… stand as close to the middle as possible. I have lost so much time when standing on the edges, it’s insane. In my record run, I lost close to 10 seconds because of this. Now, while facing the fire, open your inventory and move 3x to the right to select the flower. This will open the chest. Move towards the chest and face up and open it. After that, Indy will say that he found Urgon’s Part and the level ends.

Conclusion

Shambala is quite the insane run and after the first four shorter levels, this level is the first of a set of three quite lengthy levels with a lot of tricky jumps and avoiding enemies. Now, currently the world record is 7 minutes and 51 seconds. I have pointed out where I lost time in this article and if you count that all together, you have roughly 30 seconds.

I honestly think that 7 minutes 30 seconds is humanly possible for this level. Maybe even 7 minutes 20. But, that means there is barely any room for error and you need to take a lot of risks and be very lucky with the guards movements.

Usually, when I’m doing attempts for a new full game any % run, I usually know after Shambala if this is going to be a good or bad attempt. Another level is the Volcano, but the reason why I call it my run killer will be explained when I talk about that level.

Currently, when I’m doing speedrun pratice, I’m trying to perfect Shambala. I want a clean recording of my personal best and I want to see how much lower I can take that all treasures record. Now, my first record for the any % of this level was 8 minutes 55 seconds and for all treasures it was 9 minutes 46 seconds. I have saved a minute for each category for this level, and I can go lower. So, keep your eye out on the leaderboards, since as soon as I preform a run that beats my current record run, I’ll post it.

And with that said, I have said everything about this level for now. If you have any questions about this guide, feel free to ask them in the comments. Also, I wish everybody a happy new year, since this is the first article I’m going to publish in 2024. I also want to thank you for reading this article and I hope you enjoyed reading it as much as I enjoyed writing it. I hope to be able to weclome you in the next article and until then have a great rest of your day and take care.

First Impression: The Legend Of Zelda – Tears Of The Kingdom (Switch) ~ Where To Now?

WikipediaZelda.com page

In 2017, Nintendo changed the open world adventure game genre forever with Breath of the Wild. We got a game where freedom was the central mechanic in the game. You could play it however you want and have your own unique adventure. Two years after the release at E3 2019, we got our first teaser that a sequel was in development. In May 2023, that sequel finally released. Now, is this sequel worth our time and money? I played this game and after several hours, I’m ready to give my opinion on the game. I haven’t beaten the game yet, but I’m quite close to the ending, hence why I place this review in the first impression category. So, let’s dive right into Link’s latest adventure and let’s take a look if it’s a game we should be playing or if it’s one that we are overhyping since it’s getting high scores across the board from other reviewers. Here is my honest opinion, and if you want to say something about this game and/or the content of this article… Feel free to do that in the comments down below! Enough stalling, let’s go!

Where to now?

In this game, we take control of Link. In this story, Link and Zelda are investigating strange tunnels underneath Hyrule. While exploring these tunnels, they come across some ancient evil. This ancient evil awakes from its slumber and after a small battle, Zelda disappears, Link gets wounded and the Master Sword almost gets destroyed.

After that, Link gets rescued by a strange figure who heals his wounds. But his arm was beyond saving so that strange figure gives his arm to Link. After that, Link walks out of the cave where he was recovering and finds himself in the sky, ready to explore the new world… so he can start his quest to try to find and rescue Zelda.

Since you can experience this story at your own peace and order, it’s difficult to review this story. Due to the fact you can experience it out of order, some dialogues have to be kept vague and generic. Since, writing separate dialogue for each possible option would be a nightmare to write, program and debug.

Yet, I feel that in this game… The story and world building is more present this time around compared to Breath of the Wild. In Breath of the Wild, I felt that each town was its own mini-story with only the main plot holding those stories together. But, in this game, there are a lot more things in the world that gives life to the world. The main and side story segments are more spread around on the map. I can’t really put on my finger on exactly why, but I felt that Hyrule was more alive this time around compared to Breath of the Wild.

Something that can also make or break your story is the voice acting. In this game, apart from your grunts and things of that nature, we have a silent Link. The voice cast for the English version is extremely solid. Overall, I find that the voice acting in this game is good. Here and there, some scenes are dancing on the line of over acting, but I don’t dislike it. I think that the biggest issue is that a lot of people were used to the characters being silent. When characters are silent, you tend to put your own voice and tone on that character. This makes it impossible to find a voice for the character that everybody will like. So, I can understand why people dislike the voice acting in this game.

Honestly, the voice acting still drew me into the game. I feel that they are going on a good path forward here, and Nintendo should start to experiment with putting more voice acting in their games to see what works and doesn’t. Since, I that’s one big thing I missed in a game like Pokémon Scarlet and Voilet. Granted, the grunts of the NPC’s make them adorable, which fit this game nicely.

So, overall, with a world that feels way more alive and a story that’s more present while you are exploring the game… I feel that they improved that over Breath of the Wild by a more than a mile. Yet, I feel there is one issue at the start of this game that I didn’t have with Breath of the Wild. I quite often asked myself, “where to now?”.

After the tutorial sky island, we get dropped into Hyrule. So, we think that the world just has some sky islands now. And then suddenly, you learn about something in the underground. So, you think… Oh, caves. But then you find a hole that goes deeper and deeper… Almost to the center of the world. And then you find out that the map almost doubled in size. I felt overwhelmed at what to tackle first and where to go next.

Is this an issue or a blessing? Well, that depends on your playstyle and how you want to tackle this game. I see this game as a giant playground that we can explore and have amazing adventures in. Like I said earlier, the world now feels way more alive, so there is a lot more to do and explore. Yet, if you want some guidance, the main quest line does an excellent job at pushing you towards your next objective. But, do explore around in each area, you never know what you’ll find.

How shall we do this?

If you asked me to talk about each mechanic in this game, both old and new, we would be here for a while. A long while. The amount of things you can do in this game is so vast, it’s like asking which games you can play with a few balls.

At its core, this game is Breath of the Wild with a lot of new mechanics. And I really mean, a lot. Let’s start by talking about Link’s new abilities. In this game, you have four new abilities. First is the Ultrahand, compare that with Magnesis from Breath of the Wild… but this time you can pick up almost anything. And then, you put two logs next to each other, and you notice that some green liquid puts them together. And then it doesn’t take long before you learn that you can build a ton of machines by putting a lot of things together.

And then you wonder what would happen if I put a rock on your sword? Well, why not use the second new ability, then? Fuse. This ability is just insane. With this, you can create various new weapons and just do unique things. It’s a lot of fun to experiment and learn which things do what.

We do have two other abilities as well. Let’s talk about recall first. With this ability, Link can rewind time on an object for a set amount of time. I’ll explain it with this example. Image an ice-cold river where rafts are flowing over, yet you have to reach the other side. Well, when you hope on the raft and use recall… the rafts goes against the flow back to its previous position, helping you to cross the ice-cold river.

Finally, we have the Ascend ability. This ability feels like a sort of cheat, since whenever there is a flat surface you can stand underneath, you can ascend through the ceiling to the top. And it’s used so well in this game, it’s insane.

You don’t have the abilities from Breath of the Wild anymore, but these just open a whole other way to interact with the world and sets the two games apart and makes both of them unique. Now, I haven’t talked about all abilities, but let’s talk about the new champion abilities.

This is where I have one problem with the game. The new champion abilities are fine, while I miss Revali’s gale. But, the way to activate them is annoying sometimes. After you have completed a champion quest, you unlock their ability. Their spirit runs next to you and when you want to use their ability, you have to get close to them and press “A”. Now, this is where the issue lies.

It’s way too easy to press “A”. Often, I activated one of the abilities by accident. You don’t want to know how many times I activated the Sage of Wind’s ability and saw my sweet loot go over a cliff edge… Or my trying to find the Sage of Fire since I want to break a break-able wall, so I don’t have to use my weapons or a bomb flower. At the other hand, it’s a blessing that they help you fight, and they helped me to get out of tight spots… But, sometimes it works against the player.

Sadly, this isn’t the only small problem this game has. Another annoying problem in my opinion is that when you enter a shrine where all your items are taken away to have a special and unique challenge… Don’t pick up the enemy loot when you want to keep it. Since, when you get your items back, you don’t always get the loot back you picked up. I learned that the hard way. Since, I wanted to charge my battery for Zonai devices.

Oh yeah, that’s another big thing. Remember the Master Cycle Zero in Breath of the Wild? Well, that’s back in a way. But this time, it’s way more than just a bike. Earlier, I talked about how you can build machines with Ultrahand. Well, with Zonai devices you can do some much more stuff. Image making a raft and placing a fan on top of it. Put that raft on the water and activate the fan and away you go. And this is truly the tip of the iceberg on what you can do. Let me just say that people already build things that allow them to fly or make tanks. Yes, tanks.

While there are a lot of build tutorials online… personally, I highly recommend toying around with it yourself. I feel that this game is the strongest when you go in blind and try to do your own thing. I don’t mean that you can’t inspiration from others, but I’m saying that you should make your own adventure in this game. Just like if you want to use the duplication glitches in this game. Yes, there are duplication glitches in this game. While Nintendo is trying to patch them out, a new one or ones are discovered not too long after. Personally, I’m not using these duplication glitches since they would ruin the magic of trying to use what I find for me. But, that’s the beauty of this game… You are free to play it how you want.

Making steps towards the end

I know that I’m leaving out a lot of mechanics from this review. To name just a few: the improved stables, the return of the koroks, the whole depths, the wells… There is so much to do in this game, it is insane. Maybe a bit too much since some things can feel a bit undercooked like the main Gerudo quest before the temple.

Everytime I play this game, I feel like I’m taking more steps towards completing this game. Personally, I try to avoid following guides as much as possible since I love the feeling I get for discovering the solution myself.

Yes, sometimes I run into small little problems like having to fight to remove an icon from the map and place another… But, apart from some minor issues, I have a lot of trouble finding negatives in this game. The controls of this game are excellent, responsive and a joy to use. Sometimes I struggle a bit with rotation and Ultrahand but this happens so rarely and most of the time going out and back into rotation mode fixes it for me.

Also, the game is less silent during exploration. The enviroment sounds are much more present and we get the clamic envoriment tracks being played more often. In this game we get a mix of old and new music and the soundtrack of this game is just amazing. I have to admit that I listen to it while I work from time to time. It just brings back memories of me playing the game.

The game isn’t short at all. According to Howlongtobeat.com, this game will take you at least 60 hours to complete if you don’t use a guide or use speedrun strats. But, have you seen that avarge for 100% completion? That’s close to 230 hours.

On top of that, this game isn’t a cake walk. There are a lot of area’s where you really need to be on your guard. It’s a game that where when you learn the mechanics and how to world works, the easier the game gets. Yet, you have to be on your guard. There are ways to make things a lot easier, but these still require either skill, grinding or both.

Now, visually this game is stunning for the Nintendo Switch. Compared to Breath of the Wild, this game is a huge improvement in terms of the visuals, presentation and animations. GamingBolt wrote an amazing article comparing the visuals of Breath of the Wild and Tears of the Kingdom. Honestly, I have to agree with GamingBolt on this one. Visually, this game looks a lot better than Breath of the Wild but the Nintendo Switch is showing it’s limits sometimes. But, these moments aren’t too frequent and mostly fix themselves.

Now, this game runs at 30fps. Stable, I rarely to never actually noticed frame drops. Now, some people are saying that this game should run at 60fps or higher or “look better”. I even hear arguments that this game look like it’s stuck in last decade. Please, don’t let these comments pull you away from this game. This game runs smooth and 30fps is still very playable. Also, having a higher framerate (then 30) doesn’t mean that the game runs smoother. For some people, they don’t even notice the difference between 60pfs and 80fps. Why does it matter as long as the game runs smooth? As long as you don’t have any visual glitches and everything reacts like it should without delay? I just want to enjoy playing a game with a stable framerate than worrying about how high that framerate number goes. And that’s what Tears of the Kingdom really delivers in both handheld and docked mode with a minimal amount of issues. But, I honestly think that most of these issues don’t come from the 30fps but more from the aging hardware of the Switch.

You might have noticed that I compared this game a lot to Breath of the Wild. That’s because this game is promoted as the direct sequel to Breath of the Wild and it has a lot of subtle references to it. Just like there are a lot of easter eggs and references to previous titles. Yet, I feel like the two titles can’t be seperated. If you enjoyed Breath of the Wild, you will have a blast with this one.

Honestly… When I started playing this game, I was afraid that this game was going to be more of the same. That it would be a rehash of Breath of the Wild with a new story. But no, what we got is more than that. We got new unique mechanics, two new layers in the world, a more alive world, a lot more side quests and side content… Nintendo raised the bar again. Now, I’m honestly worried that the sequel to this game might become too big for it’s own good.

If I have to be overly critical, then I do have a few things I would love to see improved in the sequel. First of all, make the core mechanic of the temples/dungeons more unique. Please, stop with the “active x amount of terminals” since it just doesn’t help to make them unique. I feel like this time around they blended in more since you didn’t have the interactions with the Divine Beasts. The quest before entering the dugeon is a lot more memorable… But, thank you for letting us enter the dungeons after beating them.

Secondly, while this game brings a lot more to the table compared to Breath of the Wild, the core structure is largely the same. Weapons that brake easily, no real “dungeons” where you find a new unique item anymore, a ton of shrines dotted around the map… And on that level I totally understand why some people are seeing this a sort of DLC to Breath of the Wild. It’s a fair point to make. Something Nintendo can do for example is have less but longer shrines in the sequel. Or maybe even have the abilities in the big dungeons instead of the tutorial area?

Thirdly and finally, I’d love some quality of life improvements. A search bar on the map would be amazing for example. Also, give us the ability to pin a side quest AND a main quest to the map instead of abusing beacons for that. And if I’m allowed to really nitpick, I feel that in this game the visuals of a discovered shrine and a not yet discovered shrine are too similar… I “rediscovered” shrines quite often compared to Breath of the Wild.

Tears of the Kingdom took the new formula in Breath of the Wild and expanded on it. It added a lot more depth. If Nintendo takes this formula and polishes it even further and change things around they’ll have an instant hit on their hands. Don’t get me wrong, this game is incredible but it has some flaws that can’t be overlooked. Some critisms like it being more of the same are in a way valid, yet if that bothers you… is up to you.

I honestly feel that this game totally deserves it’s score. It’s one of the best games I have played and will play this year. I highly recommend it to everybody who enjoys playing Zelda games, action/adventure games and open world games. But, I feel like Tears of the Kingdom blows me more away then Breath of the Wild. But, that might be because I’m now more used to the new Zelda formula compared to the previous time.

In any case, that’s everything I wanted to saw about this game for now. Thank you so much for reading this article and I hope you enjoyed reading it as much as I enjoyed writing it. I hope to be able to welcome you in another article and until then, have a great rest of your day and take care!

Speedrunning Indiana Jones and the Infernal Machine GBC – Level 3 – Russian Border + Level 4 – Tian Shan River

In the Game Boy Color version of Indiana Jones and the Infernal Machine, there is an exclusive level. But is it really an exclusive level? Depends on your definition. In the Game Boy Color version, the River level is special. It didn’t only get cut into two, but also the whole section with the candles got cut out. While it’s a shame that the candle section got cut out, I totally understand why they did it. That whole section would be a nightmare to convert into 2D and to play. Let me already say that the 4th level in Game Boy Color version is a nightmare to speedrun perfectly. I’ll talk more about it at the end of this article. Now, with that said, I want to welcome you in this new entry in the speedrunning guide for the Game Boy Color version of Indiana Jones and the Infernal Machine. Last year, I wrote a guide for the first two levels. Canyonlands and Babylon. In those articles, I already talked about various terms like what an ILS is and the rules of the categories. So, to avoid making these articles too long, I recommend you read the introductions to the previous articles if you don’t understand something or have questions. And if anything is still unclear, feel free to leave a comment down in the comment section. Or, if you have any feedback, thoughts/opinions on this article and/or the game, I’m open to hear it in the comments.

Run updates

My main focus isn’t writing this guide at the moment. So, it’s quite possible that improvements to the runs I already wrote about happened. Now, the legend the_Kovic improved my all treasures run of Canyonlands with 21 seconds to 4 minutes 15 seconds. That’s extremely impressive, since the whole route and strategies are almost completely the same. The biggest difference is that he got luckier with the RNG of the scorpions and took a bit more risk. On top of that, his run didn’t really have any movement mistakes. Honestly, I think it will be quite tricky to lower this run more without new strategies or route changes.

For now, there were no other big differences in terms of Canyonlands and Babylon. So, I think it’s good to dive right into the Russian Border guide.

Link to Speedrun.com page (All Treasures) – Link to Speedrun.com page (Any %)
The current world record at the time of writing is owned by:

Russian Border

for Any %: the_kovic, who ran this level in 1 minute and 47 seconds on November 27th 2022.
for All Treasures: me, who ran this level in 2 minutes and 46 seconds on January 2nd 2022. (Now, at the time of writing, I have a run in verification which improves this run with 10 seconds. It would make the time, 2 minutes and 36 seconds, preformed on the February 12th 2023)

Tian Shan River

for Any %: Molotok, who ran this level in 28 seconds on August 22nd 2017.

Note: when I say something in cursive, that’s only applicable for the all treasures route. So, the cursive text can be ignored for the any % route.

The Russian Border – Route

So, right off the bat… The route differs depending on if you do the all treasures run or the any % run. So, let me first talk about the all treasures part since after the extra section, we pick up with the any % route anyways.

As soon as you pressed “A” on the level title card, hold left to go to the little ridge and jump on it. Enter the little cave you see and run to the right top. There, you’ll find a red gem.

Usually, I run to the middle of the red gem and quickly turn Indy around by going down and then at the last second, pick up the red gem. It looks somewhat like this. It might require some practice, but it’s highly do-able. I typically reset my run when I don’t exit the cave before my timer hits 11 seconds. And even I often make mistakes here. It’s a bit tense to do and easy to lose time here. After you exit the cave, go right.

So, hold right after the level title card to exit the screen. Be careful, you need to go a bit right and a bit down. Don’t hold right and down right away since you’ll get stuck behind the rock and tree and you better reset then.

On the next screen, you have to go straight ahead for a bit and before the rocks, go straight down. Now, we go to a very tricky part. Depending on how you preform the next part… You might save a lot of time, loose a bit of time or have to reset the run. We have to drop off that ledge.

There are three ledges you can land on. The worst luck is that you land on the first edge, which will make you lose a bit of time. It’s something close to half a second to a second. Ideally, you land on the middle ledge. This is a lot smaller and will cost you a bit of health, but is the most ideal. You could also jump down a bit earlier than shown in my screenshot, but that’s risky. Since, then you will have to count more on your luck. I have had in practice runs, some jumps landing on the middle ledge but more often than not, I overshot or undershot and let Indy fall to his death. The safest is that you drop down at the smaller rock and aim for the middle ledge. Since, then right after the dropdown animation, you hold right, and you are in the best spot to continue.

In this screenshot, we see the three ledges I was talking about. The single tile middle ledge is the best ledge. To progress, you have to go right. Here it’s extremely easy to get stuck in the little niche when you hold right and up. Don’t hold up too early. The best movement now is to move on the same line I’m running in the screenshot. At the end of this walkway, you have to drop and enter a cave. Don’t forget to pick up the green gem if you are on the all treasures route. Exit that cave by hugging the bottom wall and after exiting the cave, you will have to go right.

After you exit the cave and went right, you think you have to jump up the “staircase” and go left on the roof of that cave. But, there is a time save you can preform here.

Jump towards the first higher section a bit after the door. You’ll land on the edge of the first higher section. Then jump backwards towards the door and if you landed correctly, you’ll land on the roof of the cave. This little trick will save you around 2 seconds if preformed correctly. Especially when you land on the line right above the entrance of the cave.

To continue, you have to move left and go over the bridge and go down. Try to be at the most right side of the bridge when going to the next screen. Since, it’ll save you a few frames in the next screen. The next screen is an L corridor with two wolves. The top wolf is easy to avoid and will let you continue on your right wall hugging way. The bottom one is a pain. Try to not get bitten or lose health. Since, you’ll need it later in the run. I usually jump over the wolf. I rather take the time loss there, then having to go into the menu and heal. Health is going to be important from now on. Since, to save time we don’t kill the enemies.

On the next screen, you will face your first guard of this level. The damage can’t be avoided with this one. Don’t forget to pick up the blue gem, of course. Now, we are going for another fork in the route. If you do the any % route of this level, you best hug the left wall and go up. From where the health kit is. Otherwise, after picking up the blue gem… You’ll have to go to the right. And exit the screen at the most right edge.

The next two treasures are on this screen. They are located at the left and right side of the guard tower. Depending on the RNG of the guards’ movement, it’s better to pick up the left one first before the right one. But it’s a guessing game. I prefer in most cases to go to the right and pick up the golden coins there. After that I hug the guard tower and hope that the guard stays off-screen, so I take the silver coins at the left of the guard tower without too much additional health loss. Then without loosing too much health, I continue on my merry way.

Usually, I run underneath the rock and jump up towards the ledges at the left to avoid additional shots from the guard. To continue here, it’s essential to jump fast. After jumping on the ledge at the left… You’ll have to jump to the ledge on the left, and then it’s jumping up a few times. You’ll have to jump 5 times upwards and in this session, I typically take one, maybe two steps forward. If you execute it correctly, you will always land on the edge of the ledges which saves a bit of time. But, it’s something you’ll need to practice.

Now, after you reached the top and went right and down… It’s tempting to ladder snipe to get into the base. Yet, this ladder snipe is impossible to do as far as I know currently. You can skip a bit of the climbing down animation by jumping down on the ladder, but I wasn’t able to get that to work consistently enough for me to implement it in runs. It’d save over 4 seconds… But, this run is already tense enough.

I have seen the TAS by the_Kovic do it. Also, the small ladder snipe in the next room. But, jumping towards the edges of ladders on the screen… The game is so picky it’s dangerous to do. Oh yeah, don’t forget to pick up that silver bar like I show in the screenshot.

Now, if you follow the TAS… You’ll notice that we currently take a different route. One that’s safer and a bit easier to preform. The main reason why it’s easier is that it saves time not to have to preform the frame precise direct box pull strategy and not having to jump on the correct frame. We follow the all treasures route a bit more.

This discovery happened after Bluescreen18, another runner of the N64 version of this game, went and bought a copy of this version of this game. He posted the trick in the Discord and kovic and I ran with it. So, after exiting the ladder and going to the right, we jump on the box closest to the locker at the right of the room.

Now, a tricky part comes for the all treasures. Get towards the right edge of this box and mash “A”. Since, there is a treasure in this locker and you can open it via standing on the box instead of standing right in front of it. If you are able to open the locker without having to leave the box, you will save a second.

Now, from this box, we jump on the locker and then do a corner jump towards the pile of three stacked boxes. The easiest way to get this is to jump from the edge of the top locker towards the pile of boxes. But drawing that on the screenshot would make it a bit too confusing.

Now, go up in the vent and by hugging the left and bottom wall, go through the vent. After you exit the vent, you’ll enter a room with a table, two lockers and some boxes. Take the raft in the right locker, and the treasure in the left locker (in this order, since it saves you a bit of frames not going for the treasure first), and exit the room. When exiting the room, go through the vent again and after exiting the vent, drop straight down. Directly go one tile over to the left and run down. Then, you’ll have to climb down the ladder. Now, cross your fingers you have enough health remaning to tank the shots of the guard. Know that going in the menu and healing takes so much time it’s insane.

Now, we are at the final screen of the run. Depending on your health, it’s safe to land on the box to the right of the ladder. The two final treasures are located in the lockers in this room.

When you are down on the grond in this room, run towards the entrance of the river. You might notice that I drew a small purple square in the bottom right corner of the screenshot. I drew that there because that’s where you’ll have to open your menu and move towards the raft to end the level.

It’s possible to do this further from the entrance of the river and doing that saves a few frames. Do mash “A” as soon as you are in the boat since otherwise the textbox won’t disappear and you’ll lose time.

Level 4 – Tian Shan River

This level is a pain to run. Since, the movement is so exact and it’s so easy to mess up it’s insane. I have taken a screenshot of the actual route from one of the better walkthroughs out there, but it’s so tricky to explain it in words. To learn this level, it’s best that you take a look at the video of the run and learn it that way.

This is one of two levels in this game that don’t have any treasures. It would be insane if this level had any treasures to be honest.

So, for the route, you’ll have to know that mashing A makes your raft go faster. But, you’ll gain more and more momentum each and every time. And here is the annoying part, as soon as you hit the rocks or the edges… All the momentum is gone. And, we have the though luck that the fastest route through this level has many of these obstacles close to each other.

When Kovic was creating the TAS for this game, he told me that he was able to beat Molotok’s record by a few frames but that he spent too much time on it. This level is frustrating to run, it can’t be said enough. If only we could skip it, it would be a blessing. When I do full runs of the game, I try to make the time loss in the level as minimal as possible. My fatest time has been 39 seconds. It’s that rock section that does me in almost every time.

But, it’s still extremely impressive how Molotok created this amazing run and I doubt it will be improved or beaten anytime soon.

Wrapping up

I think I told my feelings about the 4th level in the previous section enough. Now, the Russian Border level is a tense run to do. It’s a short and fun run to do. But, it has so many spots where it’s easy to loose time. I honestly think that we are close to perfect runs in both categories.

Of course, I think that with better movement, my all treasures run of Border can be lowered but I would be surprised that we see a lower time then 2 minutes 30 seconds. But, I have been surprised before. Thanks to Bluescreen18’s little video on our Discord, we saw a long standing record be lowered by a second.

The next level is Shambala Sanctuary. This level is a possible run killer since it has various moments where it’s easy to drop to your death in the middle and the end of the run it’s tense. It’s also a longer level so, I have to have a good long and hard think on how I’m going to do the write up.

In any case, thank you for reading this article and guide. I hope you enjoyed reading it as much as I enjoyed writing it. I hope to be able to welcome you in another article, but until then, have a great rest of your day and take care.

First Impression: We Who Are About To Die (PC – Steam) ~ It’s But A Flesh Wound.

Steam store pageOfficial website

Usually, I try to avoid writing about early access games. Especially when they are still in development. Because, you never know if my article and review is still going to be relevant down the line. But, this time I’m making an exception. A while ago, I got a press key for ‘We who are about to die’ from the solo developer of this game. The solo developer is actually a fellow Belgian and created this project out of passion. So, as a Belgian hobbyist blogger I feel I have to write an article about his game. Although, I got a press key to review this game you don’t have to worry. When I go into the arena to battle this game, you as the crowd will get my 100% honest opinion on this game. Now that the countdown is starting, and I’m readying myself to enter the arena… I hope you as the audience for this article tell your opinion/thoughts on this game and/or the content of this article in the comment section down below. So, let’s go and start the match!

Editorial note: the review version of this game is the first publically released version after the beta versions of this game. (Early Access v0.1)

A story discussion

In this game you play as a starting Roman gladiator who is trying to raise through the ranks. In general, there isn’t really a story in this game. This game more focuses on the gameplay and it’s mechanics. Depending on what you enjoy in games, this can be a positive or a negative. Personally, I’d have like a bit more world building with a small intro or something. There are several mechanics like the four hosts who remain a bit “faceless” because they don’t have a backstory at all in the game. Now, the backstory of your own fighter is created on your battles. That works a bit like Rogue Legacy, where you can create bonus traits on your previous runs.

At the other hand, I can understand that there is no real story in this game since now the game is more open and anything can happen. We can create the story and lore ourselves, which gives the game a more sandbox-y feel. This can help with immersion into the game. Now, because certain mechanics in this game… I think it would be hard to create a story of any kind for this game and the characters.

Maybe the only thing that I’d love to see in the future in the game is a bit more historical backstory in the game. What I mean by that is that, this game uses the terms like Aspirant. But, what is an aspirant? Some history lessons would be a nice touch to this game.

So, what do you actually do in this game? The idea of this game is that you play through various battles to build up your fame and budget. With the fame and budget you can acquire various things like new gear or bonus buffs. But, a stronger character doesn’t mean a guaranteed victory. In one of my runs, I did a 5 vs 1 match and my team of 5 was beaten by that one dude since he used a strong morning star that was tricky to block.

This game is somewhat unpredictable, because there is a lot of randomness involved, you have to decide if using your hard-earned cash and fame is worth it to heal or get better gear or better save it for another roll. But do you risk waiting? Since, you might not survive the next battle and the money passed on to your next character is only a fraction of it.

Let’s please the crowd

Trying to describe the genre of this game is one of the harder things to do. Part of the core gameplay is a fighting game. In the arena, you have to fight and win the battle. Depending on your performance, you may have multipliers for your gold and fame. But, if you please the crowd by making nice hits and not hitting your teammates, the crowd throws additional weapons and gear that might win you the match. I’ll talk more about the fighting mechanics later in the article.

This game is also a strategy RPG. Since, you have to strategically uses your resources to improve the gear and stats of your character. Also, the more you use a certain weapon, the more damage you do with it. So, you have to take that into account since you won’t be using the same weapon and gear throughout your run. Using your gear efficiently is key to survival in this game. I lost one run because I forgot to repair my shield and I got cornered with my enemies, and I was unable to get a shield that the crowd threw onto the battlefield.

Earlier in this article, I already talked about the randomness in this game. So, this game is also part roguelike. Due to the rougelike elements in this game… the game becomes a huge balancing act. This game isn’t the easiest out there, but it’s forgiving in a way. It’s easy to get back into the action with a new character and to build him up. But, since the new character has different stats and perks, the gameplay is new and fresh.

If I had to place this game in a certain genre, I’d say that it’s a sort of action simulation game about gladiatorial combat. Since trying to put it in a better category would be a nightmare.

Now, let’s circle back to the combat system. This combat system isn’t your typical combat system. The best way to explain part of the combat system is the following: image that the main controls of the fighting system is the Wii remote. This game doesn’t have mention controls but the idea behind it isn’t too far off. To swing your weapon, you have to left-click and swipe your mouse into the direction you want to hit. The strength of your swipe also influences the strength of the attack. Also, when you right-click to defend, the location of your shield or weapon depends on how you swing your mouse.

There are a lot of different layers to the movement and combat that make the combat feel janky and unpolished, but it’s the entire idea behind this game. Since, you can interrupt and attack and decide to throw your weapon or shield to the enemy instead. The combat system might need some more iterations for it to feel perfect, but it’s a unique system. It may put some people off playing this game, but I find that it adds to the charm of this game. Since now the game is a bit more newcomer friendly towards people who don’t play a lot of fighting games. You don’t have to remember a lot of combos for strong attacks, you need to learn how these directional attacks work and how to use them in your favor.

This brings me onto the point of the controls of this game. The starting tutorial explains the mechanics you can use in this game quite well. The only tutorial that can use some better wording is the tutorial on how throwing weapons work. It took me a while before I was able to get throwing weapons to work consistently. Now, it’s a bit funny how the wording in the Aspirant Trainer is better than the actual tutorial. This Aspirant Trainer is a great way to quickly check your abilities in the pause menu, when you are unsure how a certain mechanic works. A very minor UI complaint is that when you click the “?” mark outside of battle, is that clicking on it again doesn’t close the explainations. You have to “approve” it on an empty part of the screen.

A great piece of advice, stay in the tutorial area as long as you need to. Get used to all the mechanics and little quirks of this game, since unless you reset your whole character and everything, you are unable to return there. And trying to learn the mechanics on the battlefield is anything but a good idea.

The current gameplay loop is as follows. You start first on the battle preparation screen where you can decide to heal, get new armor, bribe enemies… Here you make the most difficult choices since a few bad mistakes might cost you your character. When you are finished preparing your character, you choose a battle to praticipate in and fight. This can be a 1vs1, 1 vs many and many vs many.

Overall, fights are short. Most fights are done in 5 to 7 minutes. Currently, there are only 12 out of the 14 planned arena’s in the game but every arena feels unique and has it’s own additional challenges and quirks. Like one has wooden panels you can hide behind and another has a central elevated stage. Depending on your preformance in that battle, you get fame and coins for winning the battle. Loosing the battle, will mean you have to start over with a new character but you can pass a few things on, especially money.

Your goal is to buy your freedom from being an aspirant. Basically, an aspirant is a prisonner in acient Rome that’s fighting for his freedom. These goals is extremely steep and aren’t easy to achieve. Don’t expect to get it with the first few characters unless you are very good in these type of games. The difficulty in this game is a bit unforgiving. But, it has that “just one more run” mentality written over it. That “I’m going to get it this time” phrase is one I said often. And then, I’m out of glory to re-roll the fights I can enter and I get fights I know I can’t win… And then I win one by the skin of my teeth.

I’m quite curious what the other gameplay types and modes are going to be. Those who you can see on the roadmap of this game.

This game is the excellent game for one or two quick rounds and can is even fun for longer play sessions. The balance of between being not repetitive and repetitive is small but currently the game is balacing on it just fine. Especially, since you have to fight with different weapons and a unique battle system that is so much fun once it clicks.

For seven years?!

This game has been under development for seven years. Most of it is done by Jordy Lakiere, and it’s really impressive. For example, the amount of detail in the visuals is mind-blowing. The game looks wonderful and runs extremely well. In the options’ menu, you can set your max frame rate to 60FPS or 120FPS, and let me tell you that this game runs extremely smooth. My gaming desktop is getting rather old, but I didn’t have any big frame drops or lag in this game.

The effects and animations used in this game are also superb. There are a lot of weapons & shield combinations, and they all have unique animations. Something I really like is how the game slows down when you are going to make a strong hit or about to kill an enemy. Sometimes the blood animations might be a bit overboard, but then again… It feels quite rewarding when you kill that one annoying enemy with that big shield that’s blocking all your attacks since the start of the match.

The only minor complaint I have about the visual presentation is that in team battles, it’s a bit unclear sometimes who is on your team and who isn’t. This issue is mostly present in nighttime arenas where visibility is lower or when the other fighters aren’t wearing a lot of armor. Due to your teammates following you, I sometimes mistook my allies for enemies. And that negatively impacts your rewards. But on the other hand, it can be a balancing thing.

In terms of audiovisual presentation, the game is also pretty good. The music is a joy to listen too but the sound effects and sound design really adds to the atmosphere. There are a few things I’d improve on. First, I’d change the sound effect when you don’t have enough gold to purchase an item to a more “error-y” sound effect. It’s a bit “basic” and didn’t communicate the message always. Maybe add a little visual animation as well instead of only a message in the left corner.

Secondly, I think the sound effects of the weapons breaking and/or throwing should be polished up. Quite often when I was playing a character with a spear, I didn’t realize I have thrown my weapon. I feel that those sound effects get a bit too lost into the gameplay and doesn’t communicate with the player enough when you are unarmed.

And finally, I feel like the pause menu should have music as well. Since, it’s quiet, and I find that a bit boring. It could also be a great sound test when you are in the options’ menu.

Something I really like is how this game has an in-game menu to report bugs. It’s easy to use and helps the developer to quickly gather bug reports and things that the players don’t like.

Speaking of which, here are a few things I’d change and/or improve:

  • You can only see the week you are on, on the battle select screen. Why not show it over the whole screen?
  • The music doesn’t “follow up” with each other. Sometimes there is a silence gap when one track fades out and another one fades in.
  • What is “mouse X” and “mouse Y” in the keybind menu? Is that moving up and down / moving left & right? And how would you rebind that?
  • Make it easier to compare stats of armor. Since, sometimes I had to write things down or take a quick screenshot.
  • Buying an item is only possibly when you click on the icon. It also only shows the stats when you hover over it. Why not the whole box?
  • Why not have items of different status like Legendary have a special color around the icon box? It’d be easy to swap things around from your storage to your character.
  • During the game, I’d change the option in the pause menu of “Save & Quit” to “Save & Quit to main menu”. Since, that’s what happens. You don’t quit the game.

Most of those are polishing suggestions. Now, the roadmap promises more gamemodes and more things that can happen… which is all fine and amazing to look forward too. But I hope to developer doesn’t forget that sometimes it’s not about the amount of content but about the quality of the content. That’s what I sometimes forget when writing as well. I sometimes forget to make sure I still enjoy writing and write good and informative articles instead of trying to push out one a week to have more articles.

Overall, I really enjoyed my time while playing this game. I took me a battle or two to “get used” to the game but then the game hooked me. If you enjoy action simulation games or just want to try something different… This game is excellent. The game is also still in development, so more content is going to come in the future. The game is also fairly priced at 22€ here in Belgium and with the amount of polish and content there is already here, it’s a steal. The developer is also very open in his communication. I mean, look at this massive thread about the received feedback and what he is going to do with it moving forward. So, the fact he is talking about addressing a lot of the current feedback in the first patch(es), is amazing.

I think I may revisit this game on my blog after a while, when there are more patches out to see how the game evolved. Since, this is a game to keep your eye on. I’m so glad that Jordy reached out to me to try his game since it’s a real indie gem and I can’t wait to see what he is going to do next with it.

And with that said, I have said everything I wanted to say about this game for now. This amazing gem of a passion project game that’s worth your time if you enjoy action fighting games with unique mechanics. I hope you enjoyed reading this article as much as I enjoyed writing it. I hope to be able to welcome you in another article, but until then, have a great rest of your day and take care.

Speedrunning Indiana Jones and the Infernal Machine GBC – Level 2 – Babylon

In May and July, I have written about how the speedrun of Indiana Jones and the Infernal Machine for the GBC works. I wrote about the Any % route and the All Treasures route of the first level Canyonlands. Today, I want to take you on a journey to the second level Babylon. So far, we are following the levels of the N64 and PC version. But later in the game, we’ll have some differences. Anyways, before I get right into talking about the route, I want to mention that I’ll be talking certain terms and techniques that I have explained in the previous articles. If something is unclear, feel free to leave a comment in the comment section. Also, feel free to leave a comment in the comment section with your thoughts/opinions on this article! Anyways, let’s get right into it… Here I go explaining the route of the second level.

A small update

I have a few announcements to make. The first announcement is that two weeks after I published my write-up on the All Treasures route of Canyonlands, I decided to run the level again. With the possible time saves I have talked about in the article. And wouldn’t you know it, I have lowered the record from 4 minutes 41 seconds to 4 minutes and 36 seconds. Yup, I lowered the record by 5 seconds. I’m convinced that with a bit better movement and a bit more luck with RNG, the record might even go lower.

The second announcement is that all GBC categories are currently filled. What I mean by that is, that each category has at least one run. The only category that didn’t have a run was the full 100% run of the game. Where all treasures were picked up, almost all healing items (and sold) to play the full game including the secret level Return to Peru.

This run is stressful and not a lot of fun to do. Since, one or two mistakes in a level can cost you the whole level and in certain levels that can be a major time loss. In my run, I made a lot of mistakes, and I’m convinced it can get lowered, but that’s not for today. After trying for over three months, I finally got a run that I felt happy with, that made it to the end. And to my surprise, the end time was only ~25 minutes longer than my All Treasures run without Peru. The run took me 2 hours, 25 minutes and 56 seconds.

The final announcement is that I lowered a few other records. I lowered the time on Palawan Volcano and Infernal Machine. But, I’ll go more in detail about that when I get to the write-up of those levels.

With that said, here are the current stats of the second level.

Link to Speedrun.com page (All Treasures)Link to Speedrun.com page (Any %)
The current world record at the time of writing is owned by:

for Any %: the_kovic who ran this level in 4 minutes and 19 seconds on January 29th 2022.
for All Treasures: me who ran this level in 6 minutes and 44 seconds on February 28th 2022. (Note, my ILS is part of my All Treasures – No Peru record. That’s why the video time is so different.)

Editorial note: when I haven’t given credit to screenshots, it’s taken from my runs.

ILS = Individual Level Speedrun. A speedrun of only one level.

Good to know: when I talk about a “two block gap” or “a tile”… the size of a tile is give or take half Indy’s sprite.

The route

You would think that the route is quite different in the two categories due to the almost 2 minutes and a half-time difference between the two. But, let me assure you, that’s not true. The route is almost the same but only some differences that add up some time on the clock. So, I’ll mention these “side paths” in cursive when the time comes. So, the cursive text is something additional for the All Treasures route. Text in cursive should be skipped and ignored when you go for the Any % route.

The first 30 seconds of the level is the exact same for both categories. As soon as the level starts, you’ll have to mash “A” to get the text box out of the way and move to the right.

Run from the_Kovic
Run for the_Kovic

You’ll quickly reach a part of the structure where you can jump on. Jump on top of the lower brick and try to stay at the right edge of it while moving up. Here is a screenshot from the_Kovic’s run that has amazing positioning.

The reason that you have to be as close to the right edge as possible is that it saves a few frames on the jump to the right you’ll have to do when on the top.

Also, the_Kovic also discovered during making the TAS of the Any% of this game… That when you are on the edge of a block, the actual edge… You can make jumps further and higher than you expect. This’ll come in handy in the next screen. So, after the jump to the right, you’ll have to do some jumping up a “staircase” to exit the screen.

Run from the_Kovic

When you enter the next screen, it’s important that you land on the block that’s sticking out. The reason is that otherwise, you’ll lose a lot of health. Health that you’ll need later in the level.

Granted, there is a herb really close by but grabbing that herb in Any% is out of the way and makes you lose more time than landing on the block. If you are certain of your abilities, this block can be skipped when you go for the All Treasures route, but the time gain is as good as lost with picking up the herb. So, yeah. I usually try to avoid taking damage here.

Now, next is moving towards that movable brown block. In the current world record by the_Kovic, he actually lost time. Remember how I talked about the discovery he made during the creation of the TAS? Well, you can make two gap jumps and land one block higher when you jump from the edge of the block. It’s something you can see in action in my All Treasures run at the 6 minutes mark.

Sadly, this is quite a precise trick and being able to do it saves ~ 2 to 3 seconds. Yet, failing it… Well, let’s say it can cost you ~ 5 or even more seconds. Depending on if you move the block or not. This jump can be implemented in more spots, but it’s not too beginner-friendly. Since, the edge of the block almost looks like Indy isn’t touching the block anymore at all.

Anyway, after you made this jump you’ll have to jump on the building. Be careful when you jump since almost the whole back tile is blocked by a wall. So, don’t jump too early. When you land on the building, a small cutscene plays with a door opening. And here is where the first route difference happens. After the cutscene, you’ll have two options.

The blue arrow points to the all treasures route and the red arrow to the Any % route. Now, this door goes to a location where you only pick up one treasure and only has one entrance and exit. So, after picking up that treasure, you’ll have to jump on the building again and continue with the Any % route.

Now, let’s pick up our first treasure. To enter the door, you can either drop and run or jump from the block.

Jumping is a few frames difference since jumping is a tad bit faster compared to first having the dropping down animation. Anyhow, it can also be a mental thing… It feels faster to me. Now that we entered the room, we have to do something that I always call… Dancing with the guard. The treasure is in the top left corner of the room. In the top right, a guard spawns. This guard is annoying and can decide if you lose time or not.

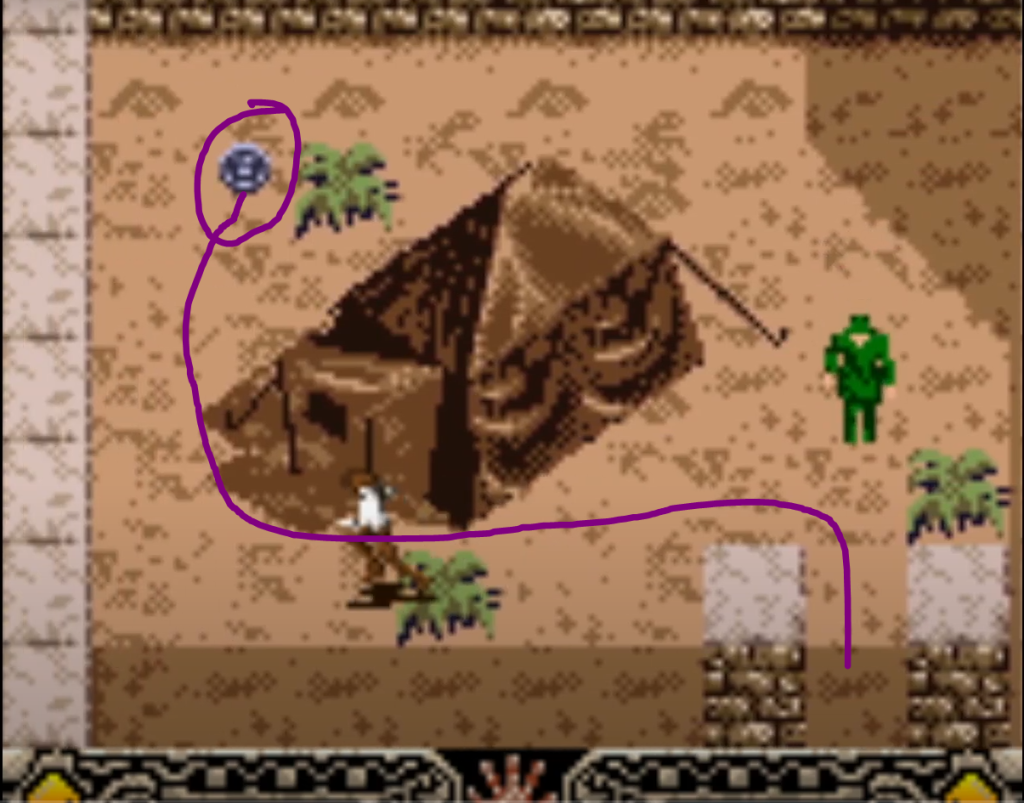
The fastest way to get the first treasure is going to the bottom of the tent and picking up the treasure, like the purple line shows. Now, the faster you do this, the less far down the guard goes. If the guard is at the position from the screenshot, you are safe to leave in the exact same way you came. Otherwise, you’ll have to go around via the top of the tent and lure the guard a bit away from the exit. Since, his hit box otherwise blocks the exit if you take the bottom route. Going via the top route looses a second but is safer. Also, if you lost too much health, don’t take the herb from the other screen… There will be a herb that’s a bit later you can grab that’s less of a time loss. Now, take the route with the red arrow before the cursive text began.

So, when you jumped over the gap and moved down to the next screen. Here, you’ll enter a room with two treasures and this room is a pain for the All Treasures %. But, for the Any %, you’ll have to just drop in the water… Or when you know the right spot, jump into the water to save a few frames.

Now, picking up these treasures is a pain in the behind. It doesn’t matter to which way you jump first. But it matters from where. The safest is jumping from inside the purple squares. The best thing that can happen when you jump wrong is that you hit the wall. The worst thing that can happen when you jump wrong is that you drop into the water, and you’ll have to go around to get another chance. And that time loss, is way too high when you want to beat the ILS. This can only be a back-up strat in full game runs. In any case, after picking up the two gems, drop down in the water, so we follow the Any% route again.

After dropping into the water, you’ll have to swim up. Now, for the all treasures route of this level, you’ll have to make a small detour. The quickest way to exit the water for the Any% route is like the black arrow, hugging all the way to the left. For the All Treasures route, let’s go with the red arrow. You’ll enter the same room but for the all treasures route, swimming all the way to the right avoids one scorpion to pick up the treasure. Also, there is a herb in the middle of the path. Something good to know is that this herb also cures poison stings.

So, let’s pick up our fourth treasure. For this treasure, you’ll have to avoid some scorpions in narrow hallways. After exiting the water, go up right away until you hit the well and then go to the left. You’ll find a blue gem. Be careful with jumping to avoid the scorpions on your way back to the other side of the wall where you picked up the blue gem… Since, jumping too far means, back into the water with you.

When exiting the water following the black arrow, avoid the sting when going up and exit the screen via the left exit. When you are following the All Treasure route of this level, the room you enter in might look familiar. It’s on top of the room with the tent where the first treasure is picked up. When you missed picking up the second and/or third treasure… Those gems, you can drop down here to get another shot.

Depending on how good your lines are, you won’t loose too much health in this screen. Go around the bend and jump on the ladder when there is one tile between you and that will make Indy grab almost the top of the ladder. After climbing up, go left right away, with a bit of luck, the guard won’t shoot you. After that, go down when you can’t go left anymore. But don’t hug the right most edge of the pathway down since the screen transition to the next screen won’t happen.

In the next screen, go to the left and drop down in the section without the guard. To get to the next screen, run on the left most line of the sand. Walking on the tiles won’t transition you to the next screen. On the next screen, hug the left wall and when it bends to the left, go left as well all the while hugging the wall. Now, you’ll come into an open area.

Let’s go a bit to the right to pick up the treasure we saw when entering this screen. When you jump up the block via the right edge to reach the right edge of the platform… You’ll be able to grab the golden coins without the guard being alerted.

Now, go left a tiny bit to enter the door. You’ll enter a small room with a lever. Try to flip the lever as early as you can. This’ll open a bigger door to the left. Exit the room and go to the left to the newly opened door. Now, it’s time to dodge some guards. Also, don’t get distracted but this is one of the few rooms where you’ll notice some slowdown, it looks like this room isn’t optimized and in the long corridor, you’ll notice it… If you don’t hug the wall that is.

In this office space, there are three guards. Now, not taking damage here is almost impossible. So, dodge and weave boys. Go up, go left (don’t forget to pick up the treasure in the first office room, to the left) and go down. Go to the right. Now, in the one to last room, you’ll see a David Star with a hint to solve a block puzzle later. Since we are speedrunning, we shall ignore going into that room since the solution is easy and will be shown later in the article.

When you go up after the room, you’ll see the last guard. If you lost too much health, feel free to pick up the herb. If you have at least half your health, you are safe to continue. Shoot the two barrels so they explore and you can continue to the next screen.

The way forward is quite clear, it’s going down. This will make Indy drop down into a pool of water and now we get to the water maze. The biggest reason why there is such a big time difference between the Any % route and the All Treausures.

Now, allow me to me to use a diagram from the walkthrough by Jeff H. to explain the next parts. The red line is how the fast way in the underwater maze is. Always hug the walls, since that saves frames. Also, there is a small mistake in the diagram. The part before the last bend is a bit higher than shown on the diagram. Don’t waste too much time, since it’s a thight squeeze otherwise. When you go for the all treasures route, do pick up the first treasure in the first swim. After picking up treasure one, exit the water maze and let the breath meter fill before you go to pick up treasure two. This additional swim is one of the biggest reasons for the time difference. We have collected 8 treasures now. Be careful to not press A too soon to pick up the treasures, since Indy’ll swing his machette and this is a small timeloss.

After exiting the water maze, you’ll notice two pressure plates to the edges of the room. First go for the left one and then for the right one. This’ll activate an elevator down in a small cutscene. Then, from the right switch, go up to hit another pressure plate. Hit this switch three times by going on it and off it and on it again. The faster you do this, the more time you save. Then, press the pressure plate one of the left also three times for a small door opening cutscene. Enter that door.

Now, you will enter the room with the David Star where you saw the clue earlier. Move the right block to the most bottom spot on the star. Move the left block to the second spot if when counting anti-clockwise. A door should open. A visual aid:

We are almost at the end of this level. Let’s pick up some tablets. Now, remember this moment for a bit later in the article. Go to the left right away to find a small platform with a yellow L looking thing on it. This is one of the four tablets you’ll need to finish this level.

The red circle in the screenshot is where the tablet was. Now, the next jumps are a bit tricky if you aren’t too used to diagonal jumps in this game. Of course, in the all treasure route, we pick up the treasure. Doing this jump to the ladder saves some climbing time. And like I explained in the Canyonlands write-up, climbing in this game is extremely slow.

When you reach the top of this ladder, you’ll see another L-tablet. Of course, pick that up. Then use your whip to reach the platform to the right. On that platform, pick up the tablet and use your whip to go to the right again to go pick up the final clay tablet.

Now, on the last platform, there is an extremely tricky ladder snipe you can do. The ladder at the bottom is extremely close and it’s extremely easy to over or undershoot it. Feel free to try it since it save a few seconds, but missing the snipe means game over. I usually play it safe and jump across the gap on the right to slide down. This is one of the main reasons why I said you’ll need some health, since if you keep pressing down to go faster on this slide down, you’ll take a considerable amount of damage.

The next step is exiting the room. Now, remember that moment when I said to remember that moment? Well, if you know this room well and practice it… You’ll be able to finish this room in 45 – 50 seconds. The most annoying bit is the whip part since if you aren’t at the right spot, Indy swings his whip in the air and this is the biggest possible time loss in this room. Also, don’t forget that the SELECT button swaps faster between your inventory than actually going in it. The clay tablets don’t appear while using SELECT.

So, now you will need to head to the elevator you activated earlier. Activate the elevator by pressing A whilst having the hand icon at the bottom. This room is the final room of the level. Don’t forget to pick up the final treasure. Since, you won’t be able to pick it up as soon as you place the final tablet! I usually pick it up before doing anything else in this room.

You’ll see a cog and something that looks like a button/switch. Go stand right in front of it, facing it. Open your inventory and select the cog item. This will open the location where you need to place your four tablets you picked up.

Now, when you face the tablet placing spot… Keep calm whilst navigating the inventory. Know that the cursor goes a bit slower then when you press or hold it. The amount of time I lost by doing horrible inventory navigation, it isn’t funny anymore. After placing the 4th and final tablet, a map will be revealed and the end of the level jingle will play.

Wrapping up

This is one of the levels I rarely have trouble with. While I did make some silly movement mistakes in my All Treasures ILS, I did have the route down. I think I can shave off at least 5 to 10 seconds with a lot better movement.

Also, the current Any % world record can be beaten when the at the start, the block isn’t pulled to get on the building and the ladder snipe at the end is implemented. It would bring the record a down by a few seconds. But, you’ll need to play the level close to perfect to beat it. I tried it once and I thought I got it, but due to a bad jump, a bad lever flip to open the office area and no ladder snipe, I lost too much time.

Both records are close to fully optimized. Like I said earlier, my All Treasures has some bad movement and the_Kovic’s Any% doens’t have all tricks implemented. But, you’ll need to practice to be able to beat the times. Unless, there is something I’m overlooking or a new strategy is found or route optimization.

The biggest thing of this level is that it’s a longer level to run sandwiched between three shorter levels. Especially for the Any% runs. I mean, Canyonlands is beaten in a few seconds, and the two next levels can be beaten in give or take 2 minutes. Actually, think about it, the comment doesn’t really count if you go for the All Treasures route.

Anyways, that was the write-up for Babylon. It would be a bit silly to create two parts for this level since almost all treasures are on the Any% route or a bit besides it. But, it made for an amasuing article to write and I hope to read as well. I hope to be able to welcome you in another article but until then, have a great rest of your day and take care.

Review: Gas Station Simulator (PC – Steam) ~ Let’s Fill ’em Up

Steam storeOfficial Twitter

Sometimes, a game just piques my interest. When I saw a game called Gas Station Simulator, I directly wondered… how is this going to work? Especially since we are talking about a gas station in the middle of nowhere. So is this title worthy of your time, or should you skip it? Or maybe wait until it’s more developed? Well, in this article you’ll find my thoughts and opinions on this game. Feel free to leave your thoughts and/or opinions on the game and/or the content of this article in the comment section down below.

Let’s fill ’em up

In this game, you’ll play as an unnamed character who bought up an old gas station in the desert along a busy road. It’s your goal to bring back this station to its former glory. Your shady uncle is here to help you via the telephone.

When you arrive at the station, it’s in disrepair. There is not only trash everywhere, all the walls need a new lick of paint, the store attached to the gas station is totally gone and so on and so forth. With step by step missions, this game teaches all the different mechanics to you. These missions are a tutorial in disguise, but it doesn’t hold your hand. You are free to complete the objectives in any order you want, and you are also free to choose when you go to the next objective. Of course, you won’t be able to upgrade your gas station to the next level without completing all required missions.

Now, if you would play this game only to complete the missions, this game is rather short. It took me around 10-ish hours to beat all missions. Yet, there is more to this game after you have beaten all the missions. There are a lot of upgrades you can purchase to enhance the environment of the gas station. Most of them, but not all, are cosmetic in nature and don’t do anything to attract more customers.

Currently, there is a cheap DLC called Can’t Touch This out for this game. Personally, I recommend buying this DLC as well. Since it not only adds a small bit of post game, but it also adds a lot of new options to customize the look and feel of your gas station, and it’s totally worth it’s price.

This game also has achievements. At the moment of writing, this game has 91 achievements. Currently, I have played this game for give or take 25 hours and I have 80% of the achievements. Most of these achievements are easy to get. Others are a bit trickier to get and require either some luck or some practice. Especially the carting mini-game, to get that achievement you’ll have to become very good. Sadly, those cart controls don’t work for me. But, I’ll talk about the controls later.

Usually, in the first section of a review I talk about the story, the characters, and voice acting. Overall, the story is nothing special. It takes a backseat pretty quickly, and it’s mostly an excuse to string the missions together in a coherent way. Which is for this game a good thing, since it ups the replay value of this game.

Now, I want to talk about the voice acting in this game. Overall, the voice acting is decent, but I do have some things that I’d like to critique. I have nothing to remark on the performance of the voice actors. It sounds pretty good. But, the amount of voice lines is just lacking and plays in strange places. It doesn’t take long before you hear the same voice line over and over again. In addition to that, some voice lines play in situations where they don’t fit at all. For example, I heard a customer shout in the store when the register mini-game failed… “Look what you did to my car!”. I mean, how can a check-out in a store do that?

On top of that, I find it a missed opportunity that some situations don’t have voice acting at all. Your staff doesn’t have any voice acting. Also, as soon as customers step in their car, they have lost their voice as well. So, you’ll never hear a driver shouting to another driver to move. Also, you’ll never hear a customer shout when they aren’t being served.

These things break the atmosphere of the game a bit. It’d give the game a bit more life and immersion when customers only said the appropriate lines in the correct places and the staff would also talk. For example, a simple “Understood” or “On it, boss” when giving them assignments would go a long way.

Let’s play the balance game

So, what’s the gameplay in this game? Well, in the end there are few things your gas station has when you have completed all the missions. Each area has its own little mini-game that’s quick to get the hang of and has its own challenges.

The first is a place to fuel. In this place, you’ll have to fuel the cars of your customers. In this mini-game you have to press the left mouse button until the gauge reaches a certain level. The closer you stop pressing the left mouse button to the ordered amount, the better you get paid.

The second area that will unlock is the store. The mini-game in there is you have to scan all the items of the customer, while keeping the belt clean. As soon as an item either leaves the mini-game area OR drops in the basket without being scanned, you’ll lose that customer when you scanned all their items.

The next area that unlocks is the garage. In there, you’ll have to repair cars. The more you upgrade your garage, the more defects can be fixed with their own little steps. The garage is something you shouldn’t ignore since at the end of the game, this is the biggest source of revenue.

The final thing that unlocks is the car wash. This is a manual car wash where the mini-game is as simple as spraying the car down with water and remove as much of the dirt you can. All in all, this is quite late game and honestly, I leave it closed.

Here are a few examples of things you’ll have to do while serving customers. These are: managing your staff, making sure everything is clean, and the roads are drive-able, making sure you don’t run out of stock for the fuel tank/the garage or the store, unloading deliveries… Honestly, as soon as you get into the micromanaging of it all, you don’t have the time to keep open the car wash. If only you could put your staff to work to unload deliveries or to stock the store/garage OR even do the car wash…

And when you think, that’s all… No, there is the reputation mechanic as well. As soon as you complete a mini-game successfully, you’ll get a few reputation points that can upgrade your popularity level. The higher that level is, the better upgrades you can purchase. But, when you fail a mini-game, you’ll get negative points, and you’ll need to earn them again. There are also optional missions for bonus reputation points after you completed the story missions.

To be honest, it can become overwhelming quite quickly. Especially when you unlocked all area’s. This is why I’m so happy you can close the car wash, and you can enable/disable certain random events in the options’ menu. Don’t want to have to deal with Dennis, who vandalizes your walls? You can turn him off. Don’t want to have to deal with the rush hour party bus? You can turn that off as well. Don’t want to make sure you close your warehouse to avoid stealing? That’s something you can turn off as well. The late game challenge missions are something else.

And the final thing you can turn off, and something I turned off is the sandstorm event. This is a random event that ruin your roads and make them not drive-able and create a pile up. This is a big problem since there is only a certain amount of cars that can be present in your gas station. You can solve this issue with your excavator, but the controls for that are quite tough to control in my opinion. You also have to be extremely precise in order to scoop up the sand, and you can’t dump it anywhere else besides a sandpit at the edge of your station. It’s a mechanic that breaks the flow of the game for me, so I turned it off.

I’m convinced that while talking about all the different area’s your station will have at the end… I forgot to talk about a few mechanics. But overall, this game is a balancing act. You have to juggle various tasks to make sure your gas station runs smoothly, so you don’t have to loan money from uncle. It’s something you can do, but you’ll have a time limit to pay him back. “Or else, Uncle has other ways to earn his money back.”

The reason I can’t tell you what the consequence is, is because it’s extremely easy to pay uncle back when you use it wisely. I never had any moment where I was in trouble of not being able to pay uncle. I mostly used his loan when I was low on stock for the garage and after repairing a few cars, I was able to pay him back easily.

Now, let’s talk about decoration. First, the painting. You can paint your gas station. But, I honestly feel that this mechanic doesn’t work too great. The mini-game to stay in the green area of a slowly rotating circle is annoying and boring and there is no way to cancel when you selected the wrong color. There is also no way to paint the selling in the building itself. You can only paint the roof. Oh, and when you install additional bathrooms, forget painting them. Since, you are unable to enter those. Which is annoying, since the paint decays in this game, so you’ll have to reapply paint after a while and it’s so frustrating to see the dirty paint back there without being able to get there.

In general, all spots are quite easy to reach apart from a few spots in the storage area and the garage. The spots in the storage area are just a bit to reach and the spots in the garage are blocked because the tire rack is in the way and the game thinks you want to fill the tire rack.

Also, you can order a paint job, but this is something I did once and regretted right away. Since, I had a color scheme I got used to and this paint job paints almost everything white. It’d be so much more useful if the color you put on the wall is remembered and for example, for some additional charge that color is applied.

To be honest, I haven’t played too much with the decoration mechanics. I find the default gas station more then enjoyable to play with and first I want to be able to purchase all other decorations before creating a totally new store.

Running out of gas?

This game is being developed by a small indie game studio from Poland called Drago Entertainment. A few days ago, they shared an update on their plans for the rest of the year. Now, why do I talk about this in a review on one of their games. Because they are talking about new features coming to this game in the future and how everything works behind the scenes.

It’s quite clear that the developers are extremely passionate and find communication with their players important. Over the summer break, they also shared what the next update to this game will have. Something I really love to see is there is going to be a patch for the random crashes this game has. In the late game, this game can crash quite often at random moments. There are some work arounds that delay the crashing but at the moment, apart from waiting for the patch, no real fix has been found. Also, you’ll be able to open and close other sections of the gas station. This is something I was going to talk about in this section. I’m quite curious to see how the game preforms when update #7 lands, since it promises to fix the biggest problem I have with this game and that are the random crashes.

Visually, this game look quite good overall. You do see certain models a lot of times but it doesn’t bother me. I think something that might help is randomize the color of the clothing of your customers. Then, when you have the same model coming in, there is a bit more variaty. The animations of this game are great as well.

But, there are a few minor things in terms of the UI that I’d love to see changed. The first is a small one. Why is the default option when you open the main menu, “new game”? I can understand that for when it’s the first time you play the game, but when you reboot the game after a crash and mash a bit… It’s scary to see the game restarting.

And secondly, it’s a mix between a gameplay problem and UI problem. The car wash is extremely picky. Sometimes a car is done with a lot of dirt on it and sometimes you have to clean almost everything. A sort of meter on how statified the customer is would help a lot.

The soundtrack of this game is good. It fits the atmosphere of you working in a gas station in the American desert quite well. The only downside is that there aren’t a lot of tracks so it won’t take long before you hear repeats. In terms of the music, I like and dislike how they handeld it. In the buildings, it’s played from the radio. But, if you put the radio in the store in a corner, it’s possible that, that area is silent. In terms of sound effects, this game is perfect. I don’t have any complaints or even (nitpicky) remarks about them.

Apart from the random crashes, this game runs overall quite stable. But, there are a lot of glitchy moments where things mess up. I have seen flipped delivery trucks on route to the station. I have also seen trash bags glitching through the floor into the void. The physics can go haywire sometimes. Jumping into the side of a car can send it flying or moving in some crazy ways.

Thankfully, the game has a sort of reset button for when cars get flipped or get stuck and you are unable to get them unstuck. You can send an alien craft over your station and reset it all. But, do keep in mind that it also sends your staff into rest mode so, you’ll have to reassign their job.

Speaking about staff and jobs, I truly wish you could manage that a bit more. I’d love to see shedules or commands like: “When you are done resting, go to the garage and fix cars.” Then again, it’d ruin a bit of the challenge of this game micromanaging it all.

Overall, the controls are quite responsive and easy to learn. You can also rebind them if needed. Since, at first, this game thought I had an QWERTY keyboard lay-out but I’m from Belgium and we use AZERTY around here.

I do have to say that reviewing games that still get new updates with new features and bug fixes is quite tricky. Especially, since I don’t know to what degree I can talk about the glitches in this game. There are glitches in this game and most of them are either the physics engine doing strange things are characters doing strange floating stuff. Or talking about limiting mechanics like only being able to have a loan of 1K. We never know what will change in the future. So, maybe some points I talked about in this review will be irrelevant in the future. Like, how tricky it is to restock shelves sometimes. The amount of times I took stock from shelves by accident when trying to refill, it’s silly.

But, something I’m totally looking forward too is that in the upcoming days a new DLC for the 1 year anniversairy of the game will come out. And looking at the store page, it’ll be a free DLC. I’m quite curious to see what’s going to be in it!

The final thing I want to talk about is that this game has an autosave. You can’t set the interval of it but every few minutes, this game autosaves. But you can also manually save. The saving and loading in this game is really quick. You do have some minor texture popping when the game loads in for the first time but it fixes itself quite fast.

Now, with that said, I have said everything I wanted to say about this game. I think it’s high time to wrap this one up.

Wrapping up

The bad:

-Still have some polishing up to do.

-Some mechanics like painting need an overhaul

-Silent staff

-The random crashes

The good:

+ Enjoyable micromanagement simulation.

+ A lot of freedom in terms of customization.

+ Amazing replay value.

+ Easy to learn but tricky to master.

+ A lot of post game.

+ Gets new content and bug fixes often.

+ …

Final thoughts:

Gas Station Simulator is one of those games that I’d recommend without any doubt in my mind. This game is quite enjoyable to play for everybody who enjoys simulation games that are a bit more hands on instead of your “spreadsheet simulator” where you stare mostly at stats.

While this game isn’t perfect and still needs some polishing and expanding for certain mechanics… The postives outweigh the negatives here by a lot. The biggest issue at the moment of writing are the random crashes but if the promised upcoming update fixes those, I think that this game can shine even brighter.

This game has an amazing foundation to become an amazing indie title. If this game gets polished up so it’s less janky and has a bit more content, I think you might have a winner here. I’d happily fuel up my tank with this game after a long day at work. But now, I’d fuel it up until it randomly crashes.

In conclusion, I quite enjoy this game with jank and all. It has a lot of charm and I can’t recommend it enough. I’m so glad that I gave this game a shot and I hope you will to.

With that said, I have said everything I wanted to say about this game. I want to thank you for reading and I hope you enjoyed reading this article as much as I enjoyed writing it. I hope to be able to welcome you in a future article but until then, have a great rest of your day and take care.

Score: 80/100

Speedrunning Indiana Jones and the Infernal Machine GBC – Level 1 – Canyonlands (Part 2)

Introduction to this miniseries

A while ago, I wrote an article about speedrunning one of my most treasured childhood games. One of my yearly traditions is playing through this game and ever since last year, I wanted to have a new challenge. That challenge I found in speedrunning the game, and now when I’m playing the game, I try to challenge myself to try to beat my PB. In this miniseries, I’m going to talk about the current route, tips, and tricks of the Game Boy Color speedrun of this game. So, let’s grab our hat and whip and let’s dive right into the first level… again? Well, yes. It’ll soon become clear. Also, feel free to leave a comment down below with your thoughts and/or opinions on this article, the content, the game and/or the route.

Introduction to All Treasures

In the first part, linked higher, of this miniseries… I talked about the Any% route. Basically, the goal in the Any% category is to finish the level as quickly as possible. Now, there is another category we have and that’s “All Treasures”.

So, in each level of this game, 10 treasures are hidden. The Game Boy Color version is an exception to that, since it has two levels with no treasures. This exception doesn’t even apply to the PC nor the N64 version.

The treasures are meant to buy supplies at the “IQ store” in between levels. In the PC & N64 version, you can buy more varied health items and ammo but in the GBC (Game Boy Color) version, you can only buy either a health kit or a poison kit. And you can have a max stock of 5, which is also different compared to the PC & N64 version.

Now, all treasures is a tricky run to do. Since, in the GBC version, you need to play close to perfection if you want to unlock the final “secret” level Peru. In a full game all treasures run you can choose between two categories. You either go for “All Treasures (No Peru)” or “2055 IQ”.

The tricky thing about “2055 IQ” is that you basically can’t close to anything, or you won’t have enough points to go to the Peru level. And in the run, you aren’t allowed to cheat and after beating the game enter the level code and skip the challenge. But, the tricky thing is that some levels require you to use a health pack for the quickest route. It’s a puzzle I currently haven’t attempted and plan to do one day.

But, I’ll focus on full game runs in their separate article. For now, let’s focus on Individual Levels Speedruns or ILS for short. So, how is the current route of the “All Treasures” of Canyonlands? Let’s explore!

The category rules as of writing this article:

Link to Speedrun.com page
The current world record at the time of writing is owned by me who ran this level in 4 minutes and 41 seconds on April 17th 2022.
The previous records I had were: 5m25, 4m58, 4m53.

Feel free to follow along while waiting the run.

Note: in this article I talk about time marks of the run. Since there is a failed run in the upload, the video time doesn’t match the run time. I’m sorry about that.

Note 2: when I say “current record”, I obviously mean my current record at the time of writing this article. So, I hope to clears up confusion when this record is beaten and/or improved by me or someone else.

The run explored

So, unlike the Any% route… We avoid the ladder snipe down directly. Since this snipe would make 4 out of the 10 treasures impossible to collect. So, we go left.

Now, the movement of this scorpion on the other platform is an RNG fest. In most cases, if you hug the upper wall, you can avoid it without any problem. When I get bitten by the scorpion, I reset right away. The lost health from the poison makes gathering the first treasures way more risky.

So, the sequence of events here is:

  • Jump over the safe pit
  • Huge the uppermost wall and go left
  • Jump over the unsafe pit
  • Ready Indy’s whip by mashing select twice while running left
  • Jump at the last second, so you jump over the waterfall.

If you do this sequence perfectly, you’ll be right in place to whip over the gap. Yet, this is easier said than done. The sequence of inputs I just described are close to frame perfect in some places. All these actions take place in give or take two or three seconds. When I don’t reach the other end and climbing the ladder when the timer hits 11 seconds, I know I can reset the run.

Why do I see that as a reset point? Well, because I know myself. If I allow my timer to be higher, I’ll go in a slight panic mode since I feel like I’m unable to beat my record and make too many silly mistakes sometimes costing me the whole run. So, it’s to keep myself calm. Anyway, you might have noticed that yellow coin looking thing in the 2nd screenshot. That’s one of the four treasures here. That’s the treasure you should get last. If you take this as your first treasure, you’ll lose a lot of time since there is no easy way to get back to the area with the first three treasures, and you’ll have to do the whip swing again which costs around a second or two.

Oh yes, you can save some time if you jump up right after swinging with the whip. This saves half a second in climbing, but it’s tricky to do, and a bad jump can land you either lower or just at the bottom of the ladder losing the time save. But, as far as I know, there is no real danger in trying to attempt this trick.

Now, after you climbed up… I highly suggest that you press select once so Indy’s hand is the tool you are using. Now, there is something you need to know about doors in this game.

I enter the treasure room in my current world record around 16-17 seconds. If you watch the run, you might notice that Indy looks like he is entering the wall.

Now, here is the thing about doors in this game. The hitboxes are wider than they visually appear. So, in other words, visually it looks like you can enter where the aqua line is. Yet, you can enter where I drew the white line.

Trying to enter a door as soon as possible saves a few frames, but these add up quickly in this level.

Now, this is a moment where you can make a choice. I haven’t tested it which route is faster. The first choice is that you go for the two treasures above and the second choice is that you go for the treasure at the bottom. Both have their dangers but all three need to be collected.

The sequence of collecting these three depend on me if I’m able to enter the door behind the stone you can push. Usually, I go to the right of the stone and push it to the left while hugging the wall. I let go of left at the end of the push animation to push up and usually Indy goes in the door right away.

Yet, in my current world record run I decided to do things a bit different. I decided to jump up right away and get the two treasures on top. Without pushing the stone at all. Which is a dangerous and risky move.

Usually, when you push the block to the left… You can jump up on the left side and grab the red jewel. After that, it’s easy to avoid the bastard of an enemy and grab the green jewel. Oh, jump over those tiles with the crack in them. Since, if Indy is full on that tile… He’ll fall down below in the water without any way out. Loosing your chance to pick up the treasures in this area.

If you go up right away, the chances of that enemy poising Indy is a lot higher. But if you go up, you’ll need to first go for the green jewel. Since going for the red first will make you a better target for the enemy and corner jumps are quite tricky, and I landed so many times on those unstable tiles during attempts, it’s not funny anymore. Also, I find that when you drop down after the red jewel, it’s easier to line Indy up to push the stone without having to re-orient him.

So, let’s push the stone, so we can pick up the final treasure in this treasure room. After going up, there is a very ideal way to move in this room to have the fastest time.

Yes, I’m taking screenshots of the YouTube upload

The blue and purple lines show the way towards and back from the treasure. Depending on the movement of the scorpion, it’s easier to line yourself up. While you can walk pretty close to the water… It’s a reset when you fall in. Since, you lost your chance to pick up two treasures now. In my current record, I chose to go down & around since the scorpion was a bit too close to the ideal route and I didn’t want to risk it.

And also, it’s best that you pick up the treasure on the first few frames on your way back. Since, you’ll be able to keep your momentum which saves a few frames. You can see how I do my controller inputs for this around the 37 second mark in the run.

On my way back, I noticed that the scorpion was down below, so I was able to get closer to the edge with the water. But, it’s possible to get even closer, but remember… This is quite risky since falling into the water makes you unable to obtain certain treasures. Since, unlike the PC/N64 version, there is no way to get back up here and obtain these treasures. Even in casual play.

So, around the 48-second mark… I have left the treasure room. With a bit better movement and not being poisoned by the enemy I think I can shave a second off here. Yet, it would be extremely tricky to do and risky. After leaving the treasure room, it’s time to go to the right to go down, jump over the waterfall and pick up the coins we saw earlier to pick up the final out of 4 treasures on top here.

During my current record, I lose a bit of time here as well by hugging the upper wall.

Now, comes something risky. After collecting the coins, you’ll need to jump down and try to line Indy up the closest edge of the waterfall. The goal is to land in the pool down below closest to the exit point. But, when you jump down too early… You might let Indy miss the pool and die. Jump too late, and you lose a second or two in the water since Indy swims so slow in this game. My drop/jump around the 53-second mark isn’t perfect. I was too center. I had better but I also had worse. After dropping into the water, exit it as soon as you can at the top right-hand side.

After exiting the water, you might notice that enemy and want to jump over or away from it. Don’t. Since, it’s somewhat easy to avoid and you are risking loosing time by either dropping back into the water or jumping too early/late and getting poisoned. Just move a bit down around the spot in the screenshot above. I actually moved down perfectly in my current record. Since, you need to avoid a wall and go into the door a bit behind it. This is what you see me do around the 1 minute 4 seconds mark.

Now we enter a “puzzle” room where I hate the movement with a passion. If there is one thing I’m not too good at… that’s precise movement.

The solution to the puzzle is that you need to walk on the sun tiles in a certain sequence. First, you hit the 3rd tile counting from the left. Then, go to the first tile without walking over the second tile and just walk over the rest. So, from the left the sequence is: 2-3-1-4.

The issue here is that the hitboxes of these tiles are a bit off. The tops are quite sensitive and the bottoms aren’t. So, when you try and walk from tile 3 to tile 1, it’s easy to trigger tile 2 when you go overtop. Now, it’s highly recommended that you go overtop since the treasurees will drop from the totempole you see on top this room. So, yeah, this room is tricky and might require some “training”.

Now, after the treasures drop: go for the left most treasure first! Since, the right most treasure is perfectly in line with the door. Mixing these up might cost you a few frames. After exiting this puzzle room, you go to the right. There is another stone which needs to be pushed down once and then left once. It’s possible to jump from there to ledge above the door. Yet, I find it safer and more consitent to push it left twice so the gap is only one block. For some reason, I have a hard time making those two block jumps from a lower to a higher platform. While it is possible as you’ll see in the next level.

Now, hug the wall and jump at the last second as shown in the screenshot below here. If you do it right, you’ll grab the ladder and skip a part of the climbing animation. This is one of the minor optimisations you can do to save a few frames. Yet, be careful with trying this one. If you push Indy too much to the left, you will not grab the ladder and miss the platform and have to go back on the ledge.

After this, it’s a bit of climbing we need to do. Jump earlier to the ladder to skip climbing it when you can. This is an easy trick to master which can shave so much time off your runs. After the 2nd ladder, be careful since there is a scorpion quite close to the part where you accend from the ladder and being poisoned there is real easy. That’s why I usually jump forwards once to avoid that and get closer to the door.

Be sure you are at least more half health now since there are some parts coming up that will require you to be able to tank/take some damage. If needed, there is a herb in the hallway. Herbs are faster to heal compared to going into the menu, going to a medkit and then going out of the menu. You see me pick up the one outside of the hallway around the 2 minute 2 seconds mark.

There is a reason why I take out the pistol around the 2 minute 18 seconds mark. Because there are some enemies coming up which are difficult to avoid when you exit a door. I rather shoot them to be safe. Now, it’s possible to save a bit of time to do a corner jump from the ladder platform as shown with the purple line. But, it’s a tricky one and might cause you to loose your run. Corner jumps are in general not easy in this game. Usually, I take the safe route wit the lightblue line. Which looses a few frames, but it’s safer and more consistent.

Now, after this, you can make another choice. Go right into the closest door or go for another treasure. There are 4 left we still need to get and it doesn’t really matter which one you go for first. I usually go for the bottom one last. If you want to go for the bottom one first, be my guest. This will be the last treasure talked about in this article.

So, I go into the closest door right after killing that enemy. In that case, don’t put your revolver away. Since, scorpions have this nasty “”feature”” where they can poison you during the whipping across animation. So, shoot the scorpion dead when you enter the room and go left to whip across. Remember to use select to switch between your tools to save time. Opening & closing the menu adds so much additional time.

Now, don’t make the same mistake as me here. When you need to whip across, you shouldn’t be right at the edge since Indy’ll whip in front of him then. And this’ll cost you a second or so. Stand a bit more back. When you are swinging across, you might notice the next treasure.

If you pick it up now, it’s fine. If you want to pick it up on your way back… It’s fine as well. The time to pick up this treasure is the same either way. In my current record, I chose to pick it up after the two treasures after whipping across again. So, don’t forget to pick this one up if you skip it now. But, after whipping across… Shoot the enemy, for a similar reason as before. Now, after that, you’ll see two doors at the bottom.

You can choose the sequence of the two here. Since I have the gun equiped, I prefer the left door first. So, I’ll explain the right part later.

The gun is equiped and we go in the left door. The gun is needed since there is a nasty troll scorpion that you will encouter right after exiting the hallway after the door. Either move to the right, right away, or shoot it. If you shot it without getting poisoned, count yourself lucky since that will make the upcoming part way easier.

Now, the treasure is at the bottom of this section. Drop down as quickly as you can without taking too much damage. Since, you’ll need the health to tank scorpion poison since they are so nastly placed. Be sure to switch back to the hand to pick up the treasure box. I started my decent on the 2 minutes 47 seconds mark. The decent was quite clean. But, my ascend. Oh boy. From 2 minutes 56 seconds you see some messy jumping and me getting screwed over by scorpion poison twice. It’s something to costs me so much time and doing the ascend propely is somewhat stressful.

So, after the hallway, equip your gun again to kill the newly spawned scorpion and now, it’s time to explain the right door. For that door, be sure you have the hand equipped. Since, right after exiting the door, you’ll have to drop down.

If you drop down on the corner edge of the platform, you reach the hitbox when Indy is in that landing animation and when you mash “A”, you’ll pick up the treasure. Go left and swap to the whip to swing across.

Jump across the death pit and be VERY careful trying to do a ladder jump here. It might save you a few frames into the climbing animation but missing the ladder means certain doom and dead run. I rarely to never risk it here since I desipe loosing a run to a silly mistake near the end of the run.

After the ladder, go to the right, up and over jump across and get back into the door. After that, swing across the two gaps and get into the door again. Now, we come back to one of the choice spots. Since I started to talk about the “top” door first, let’s go down and to the left now for the final treasure.

In here, there is the final treasure of this level. Be careful to not step on the cracked tiles since they drop you down lower in the level. And when you don’t have enough health, they are deadly.

Now, it’s time to go to the right the whole way after exiting this door. Go towards the ladder we climbing up, where I said you could save time with that risky corner jump. And now go to the right instead of the left. And then, it’s basically the Any% run route after the ladder snipe. Be careful, since now there is an extra scorpion for you to avoid. But, I use that one to jump at the right time to speed up the first long climb.

My ending was a bit messy but hey. That means more time can be shaved off this run. Since we played the full level, we see Sophia actually walk up to Indy. When you do the ladder snipe of the Any% run, Sophia won’t show up but the textbox will play.

Don’t forget to push “A” to skip the textbox faster. And yeah, that’s the whole route.

Looking back on this run, I’m certain that a run of 4 minutes 38 seconds is totally possible. Especially since I saw a lot of potential improvement while looking through this run to write this article.

Now, this level has one of the biggest differences between the Any % route and the All Treasures route. A 4-minute difference even.

After writing this article, I’m quite hyped to try and beat my record. So, I’m going to try and do that during my summer holidays. Keep an eye on my Twitter since I’ll post there when I have beaten my time.

But oh boy, was this a long article yet a fun one to write. Next time in this miniseries, I’m going to take a look at the second level Babylon. Maybe I might write only one article about that level since most of these treasures aren’t too far off the main route for Any%, yet they do cost a lot of time to grab.

And with that said, I hope you enjoyed reading this article as much as I enjoyed writing it. I hope to be able to welcome you in another article and until then, have a great rest of your day and take care.

Speedrunning Indiana Jones and the Infernal Machine GBC – Level 1 – Canyonlands (Part 1)

PC game reviewGBC review

In the past, I have reviewed the two versions of one of the biggest games in my childhood. Ever since I saw Indiana Jones – Raiders of the Lost Arc, I was hooked. When my cousin showed me that he had a 3D PC adventure game starring Indiana Jones, I kept playing that game until the disc actually broke on me. Yes, that frequently. Also, I didn’t have a lot of access to the internet and also my native language isn’t English, so navigating the early internet was a challenge. So, beating this game without it being well known… Was a challenge. It was no Pokémon where you could ask things to other kids during recess. I played this game over and over again, and a while ago I started speedrunning it. And in this new series of articles, I’m going to talk about the routes/tips & tricks on speedrunning this game. I’m going to focus on the GBC version, since that’s the version I mostly run and know best.

Some background

Foremost, I want to give some additional background. Especially since this is the first article in a series. When I got the GBC version for my birthday one day, I was unable to beat it. I was unable to finish Shambala for the longest time. There are some unlogical things you have to do if you haven’t played the PC version or if you don’t try everything.

Fast-forward to last year in April. After re-playing the game for the “I lost count how many times” time on the PC, I wanted to challenge myself. So, I thought, why not speedrun the game. And then I started running the PC version. I started the “All Treasures category” in the PC version since the “Any%” category is quite optimized.

If you are already lost in what I’m saying let me quickly fill you in. A speedrun is a challenge you can do in a game where you have to beat a level or the full game as quickly as possible without cheating. Now, abusing game mechanics or glitches is allowed. Well, depending on the category and/or game. Some terms that speedrunners use are:

  • ILS: a term used when only one level is ran.
  • Any%: a term that’s used to indicate that the goal is beaten as fast as possible by skipping as much as possible.
  • Category: an example of a category is Any% or ILS. It’s a type of speedrun, basically. You either have the complete the whole level/game 100% as fast as possible or collect all X or not take damage or not abuse a certain glitch… It explains itself basically.
  • TAS: Tool Assisted Speedrun. This means that certain tools were used to create the run. For example, using save states to create the perfect run. (A save state is “save” that saves the current state of the game at the moment the save state is made and can be loaded by the press of a button). Tools like emulators to have better quality footage of the run aren’t always TAS runs, depends on the game/community.
  • Strats: just a sort of strategy/technique.
  • PB: personal best time.

Now, I’ll try to explain terms in my article. When you don’t understand a certain term or something written in this article, feel free to leave a comment in the comment section, and I’ll do my best to answer it. Anyways, let’s start with explaining the starts and such are used in the first level of the Game Boy Color version of the game.

Any%

The official rule set at the moment of writing:

Link to Speedrun.com page
The current world record at the time of writing is owned by Molotok who ran this level in 29 seconds.
My current best at the time of writing is 30 seconds, which earns me the second place.

In the Any% route of this level, you get directly introduced the one of the biggest tricks in this game and that’s ladder sniping.

You’d think that runners are jumping to their impending doom here. Yet, this isn’t true. In this game, when you jump down, and you grab a ladder, all movement and fall damage is canceled. After Indy slides down the ramp, almost directly to the right, you can find the ending of the level.

Sadly, there are some annoying parts of this ladder snipe. For of all, take this image. On there, I have drawn a blue line and a green line. Stating the obvious I know, but go with me.

When Indy slides down at the start of the level, he stops somewhere in the blue zone. Well, more in the middle of the ramp. But the annoying thing is that when you go directly to the right then, you’ll hit a wall.

If you want to beat the WR in this level, and you hit that starting wall, you might as well reset. This ladder snipe is so optimized that the world record hasn’t been tied yet. Even master PC/N64 runner the_kovic with his 30 second run has trouble matching that 29 seconds.

After falling down, you need to grab this ladder. Grabbing the ladder when falling down is dubbed a “ladder snipe” in our community. The following image is the frame I grabbed the ladder in my PB.

This is how Molotok got the ladder snipe:

A few pixels higher and a bit more in the middle. This meant he saves some milliseconds there and actually goes faster.

After that, it’s climbing up and going to the right:

Taken from Molotoks video of his 29 second speedrun.

See the green line? Well, that’s a jump. It’s a few frames faster than walking close to it and then jumping. After that, we walk diagonally and give or take at the black X, we jump.

Why a jump towards the ladder there? Well, climbing ladders in this game is extremely slow. The fewer time spent climbing ladders, the better. In this game, you don’t need to start at the bottom of the ladder to climb one. In this game, there are a few moments where you need to drop from the top of a ladder to the bottom of another one. This means, that as soon as Indy hits a ladder, and you hold up, the game’ll cling Indy to the ladder, and you can start climbing. The game automatically centers Indy into the middle of the ladder when you grabbed the sides while climbing upwards. This little jump (ab)uses on how the ladders work to shave off a few frames.

When climbing up the ladder, a trick comes which I have a hard time mastering. And that’s when you reach the top of the ladder, you can go a bit to the side to save a few frames. For some reason, I go too much to the left and fall off. So, that’s why I don’t do it in my run but other runners and the TAS of the Any% of this game does.

It basically looks like this, done by Molotok

After that, we go a little to the left and do two jumps in quick succession.

Still taken from my 30 seconds PB.

The second jump is basically to lower the climbing time.

Comparing my PB to the world record, I notice that it’s mostly movement based. The fact that my snipes usually a little lower, and I don’t do the trick at the top of ladders. This costs me a ton of frames, making my 30 seconds run a bit slower compared to the world record.

After reaching the top, you have give or take 5 seconds of a small cutscene. I highly recommend you mash the A button at that time, since the faster the text box goes away, the better.

Now, when you do this ladder snipe and go for any%, the ending of this level is a bit different. The final scorpion isn’t present at ladder and Sophia doesn’t appear in the end credits scene. I honestly don’t know why, but it’s a unique difference between the Any% route and the “All Treasures route”.

Feedback requested

Now, before I get into the “All treasures” route of this level and the differences in a full game run and an ILS, I want to wrap up this article here. Because I want to hear from you all what you think. Would you want more articles like this? Where I talk about the route, techniques and all that? Do you want it in a different structure or in a different way? Is everything clear or are some parts confusing?

Writing about my speedrunning experiences is something I wanted to do for quite a while. Especially since this blog is a sort of diary of my gaming life and beside in update articles or on my Twitter, I haven’t really talked too in depth on my speedrunning. And since the PC & N64 routes are quite well documented, I thought it would be fun to do that for the GBC as well in my unique way.

I thought writing an article on my blog, giving the game more exposure would be way more fun than; how I wrote that guide about the locations of all the treasures in the PC version you can find on the resources page on the Indiana Jones and the Infernal Machine speedrun page. So, this is really an experimental article and depending on your feedback… I’ll continue this series and/or improve it accordingly.

Thank you so much for reading this article and I hope you enjoyed it. I know it’s something else besides my usual game reviews and such, but I felt refreshed writing about something different and still have it game related. I enjoyed writing this so much, and I can’t wait to see, hear and read the reactions. If you all enjoy this, this’ll become another series on my blog until I have talked about every level in the game and talked about the full game runs.

And with that said, I think I have to say goodbye for now. I hope to be able to welcome you in another article about speedrunning this game and/or me talking about another game. But until then, have a great rest of your day and take care.

Interview with GameChuck after “SpeedLimit” release

H2x1_NSwitchDS_SpeedLimit_image1600w

Welcome my dear reader! Today, I want to share something special. Last year, I took a look at a game called Speed Limit. When I looked at the game it was still in development but a demo was released. Now, this week the full version was released on all major platforms. You can find more information on the official website and on the website of the publisher. Now, instead of writing a very same-y article, I thought it would be more fun to talk about the game with the developers. So, that’s what’s going to happen today. I’m going to share an interview with you guys and girls that I had with GameChunck! Thank you so much for answering my questions. Before I start, feel free to leave a comment with your opinion and/or thoughts on the interview, the game and/or the content of this article. 

gamechuck_logo_200x200

Jonez: Hello there and welcome. Thank you so much for taking the time to do this interview with me. So, to whom do I have the pleasure of speaking to from the development team?

Alex: Hi, I’m Alex, the CEO of Gamechuck and level designer for some small parts of Speed Limit. Most of the development was done by others but as they are too busy celebrating our pan-console release, I will try my best to tell you everything you want to know!

Jonez: So, last year a demo for Speed Limit was released. Now, we are almost a year later and the game got more development. What is new in this full version? Did the game get easier or more difficult? 

Alex: The game is much bigger than the demo – it features 10 (or more, khm khm, spoilers) levels, with 5 distinct gameplay genres, while the demo is just the first three levels (side scrolling genre and top-down). Also, we used the feedback from the demo release to make the game much more enticing, but not easier per se (although we did add Easy mode in both the demo and the full game since then).

Jonez: Now, this game got released on multiple platforms like the PS4, PS5, XBOX One, Steam and Switch. What challenges did you face in porting this game? 

Alex: The Switch is at the same time the most slick experience (they check on everything and give you detailed feedback on where they found which error) but also quite cumbersome as every change takes a long time to get approved. Also, the PS4 had some issues regarding how we draw shaders for light for the bike rear lights, but we fixed it using clever math so now it works as intended on all platforms!

Jonez: This game is almost one long interactive movie. I guess this game wasn’t the easiest to develop since you risked to damage the flow of the game. So, what was the most challenging in developing this game? 

Alex: The most difficult part was correctly figuring out how much time it will take for each feature, and since we were starting from scratch with every level (e.g. every new genre) it was really hard, but we needed to guesstimate anyway since due to porting and so on, we were operating on a schedule.

Jonez: So, can I ask if you guys have future plans for the game? Or will this game only get bug fixes?

Alex: We hope to give the game a lot of interesting updates and maybe even DLCs, because the game this well received deserves to be continually updated! I can’t promise co-op mode (although I’d really like to!) but more modes, achievements etc. – definitely!

Jonez: You know, when I played the first level. I always wondered… Can you defeat those enemy soldiers?

Alex: No, but you can reach a stalemate with them, by standing at a spot where they can’t hurt you and just keep shooting them down!

Jonez: It didn’t take long for me to find an easter egg. The Chuck Norris easter egg was a nice gag. Are there more in the game?

Alex: A lot. Let me get back to you with an exact figure later.

Jonez: As I said earlier, this game feels like some sort of interactive action movie. How did you go about testing this game? Did you always start from the start or did you test it section by section?

Alex: We tested both specific sections and the whole game, and also used the G.Round platform for testing the game with hundreds of players prior to launch so we can iron out any big issues (there weren’t any and we got incredibly glowing remarks!)

Jonez: So, an indie studio is always known for having a small team. Who were the heroes that brought this game to life? 

Alex: The dev team is 7 people (artist Jurica and the game director Igor doing pixel art, Vanja and Karlo and one student Sara coding various levels and Matija doing sounds and music) and then there’s me, Lucija doing PR/bizdev and Iggy doing community management. 10 people seems like a lot but bear in mind we weren’t all doing the game full time and we do have a lot of other games in the pipeline!

Jonez: So, one of the biggest differences I noticed is the fact there is an easy mode. Which differences are there in the easy mode compared to the normal mode?

Alex: The difference between easy and hard is almost exclusively in the number of enemies and/or their hitpoints, and of course – the true ending is not available in Easy mode!

Jonez: It wouldn’t surprise me that the game broke quite often during development. Can you share one of the funniest moments of the game breaking during development? 

Alex: There were many but here’s one that was quite fun:

Jonez: And my final question: You are also developing another game. Tell us more about it? Did you learn anything while develeoping Speed Limit that is going to be used in that new game? 

Alex: The level designer of Speed Limit is, incidentally, also the lead writer for our narrative game Trip the Ark Fantastic. A complete departure from Speed Limit, this is a slow non-combat narrative experience about the scientific method, philosophy and cute rabbits striking for better working conditions. Now, if that didn’t hook you, then the classical animation and orchestral score will!

Jonez: Thank you so much for answering my questions! I’m quite curious to see what your studio is going to publish next. I also want to thank you all for reading this article and I hope you enjoyed reading it as much as I enjoyed writing it and putting it together. I hope to be able to welcome you in a future article but until then, have a great rest of your day and take care! 

Also, don’t forget to give SpeedLimit a try!

H2x1_NSwitchDS_SpeedLimit_image1600w

First Impression: Barn Finders (PC – Steam) ~ Let’s Find Our Stock

capsule_616x353Steam Store page

It’s no secret that I love to go to garage sales and thrift stores. I love looking around at those places to try and find unique items to add to my collection. So, when the developers of Barn Finders approached me and asked me to write a 100% honest opinion review about it, I didn’t hesitate. This game sounded right up my alley. So, after a few hours of playing this game, can I recommend this game or is this game worthy of a skip? Let’s find out while I invite you to write a comment in the comment section down below with your opinion on the game and/or the content of this article.

Side note: if this game looks interesting but you want to try it out before you buy, there is a demo on the Steam Store. 

Let’s find our stock

840948bcfe9343c08c45cdb7d429eb43In this game you play as a guy who is living in a barn with Uncle Joe. He is your oldest cousin and together you run a thrift store. But instead of people bringing their stuff in, you go to auctions and go to barns to stock your store. 
The story in this game isn’t anything special. You travel from barn to barn while doing stops in your pawn shop. You also have to deal with your customers. You can accept or decline their offer but you can also haggle with them. Pay attention since some customers will rob you blind and even literally, there are thieves in this game. 

While there isn’t a lot of story present in this game, the atmosphere and setting of this game is really well done. I really feel that this game takes place in the late ’80/early ’90 in the more rural area’s of America. 

Now, there is something that confuses me a bit. There is voice acting in this game over the radio and the upgrade shop but all the other things are sim-lish. You know, mumbling like in The Sims. I honestly think that the game would be a bit better if this mumbling met the tone of the dialogue a bit more. 

Not everything has mumble dialogue, take for example the auctions. At the moments, you rarely have mumbling of the characters. Well, you do have it for the guy running the auction but that’s quite monotone and clearly a soundbite playing on repeat. Anyways, the voice acting itself on the radio and the mumbling is quite enjoyable for the rest. I feel that they give more atmosphere to the game and even bring it more alive. 

In terms of characters in this game, well there a few characters that you meet but there isn’t a lot of character building. While this can be a turn off for some people, I personally don’t mind that much in this game. But here is the thing, there is a limited amount of character models and quite quickly you will see the same people coming to your store. You also meet the same characters on auctions. I don’t know if they are the same characters but they are the same character models. 

All over America

10d3deb9968b4beb860b64739ecdf409The gameplay of this game is three part. The first part is simple, you have to run your own pawn shop. Thankfully there are no mechanics where you have to pay the electric bills and things like that. Most of the mechanics of maintaining a the shop are explained in the tutorial and easily accessible with the “F1” key. I love it when games have a clear and nice tutorial.

I do have some minor complaints about the tutorial. First of all, I don’t know why the part of the generator is still in the tutorial since you only have to do this once. Secondly, a small table of contents would have been amazing. Thirdly, there are some minor spelling errors like: “car Battery” instead of “car battery”.  And finally, the final tutorial has some text that runs off the yellow square while in the final square you see that they made the font small to fit it all in the yellow square… I mean, some consistency please. 

Now, the second and third part of the gameplay are kinda similar and kinda not. On some maps, there is an auction that you need to do before you can explore the map completely. And sometimes there is no auction. To be honest, I didn’t like these auctions one bit because I got the impression that they were a barrier to stop the player from progressing too fast into the game. The solution for making them more interesting would be that you would get some information about the other candidates and their shop, if you are able to outbid them or not. Since the only information you get about that is there is an amount of money on the map before you move to that place. 

While exploring the map, there are a different type of things you can collect. The first type are “trash” items. These are for example: packs of cigarettes or booze. These give you a small amount of money right away. The second type of things are the materials. These are obtained by destroying interact able objects like trash cans or barrels. These items can be used to repair broken items in your pawn shop. And the final type of thing are the times you can arrange a pickup for, to sell in your pawn shop. 

Apart from that, there are collectibles in each map. These range from new floor tiles or wallpaper to a secretly hidden golden toilet roll. Now, on a lot of maps, you have a bathroom you can interact with. Each time you interact with it, a small “character goes to the bathroom” sound plays while the screen goes black. I found this funny at first but I didn’t see the joke in it. 

I do have some minor complaints about exploring the maps. First of all, the meter for the amount of remaining items is janky. I’m sorry but what does count as remaining items? And why is this some sort of health bar instead of a number? The game shows you a number when you go to the truck…? Oh, yeah, trash items don’t count for that meter. 

Secondly, is it me or are some hitboxes of digging spots a bit off? I had to move away and closer from the digging location to continue digging. Speaking about digging, it would have added to the immersion if there was a bit more animation while digging and maybe that the item you were digging up started to slowly show?

And finally, why isn’t there a counter for the amount of resources you can still pick up or trash items that are still present on the map? That would have been a great help to know if I found every single thing on the map. 

Now, this brings me to two complaints about the maintaining of your shop. The first complaint I have about that are the various stations. You can let the item you are cleaning or reaping get in a very glitchy state when you drag the item a tiny bit out of the machine and then try to clean or repair right away. 

While I was researching why my items were glitching out, I found out that you can double bind a key in the option menu. But, more on the UI later in this article. 

The second complaint I have about the shop part of the game are the hitboxes of the signs. These are too janky to use sometimes. I had a lot of trouble trying to pick another sign to hang up. 

Close enough

ss_14a44569ca3559382eda63d13e670e25b43eea0d.1920x1080If you read the previous section, you might think that the gameplay of this game isn’t the best. If you got that impression, I’m sorry but you got the wrong idea. I found this game quite enjoyable to play. But, it does have a few problems that can be solved with some patches. There is a DLC coming in the future and maybe with that DLC, some issues might get fixed. 

Is this game challenging? Well, not really. There isn’t a lot of challenge in this game. This game is perfect for when you want to relax and don’t be afraid that you get a game over screen or get stuck in a difficult level. 

Visually, this game looks quite decent. Some textures look flat like the leaves on bushes and you have the occasional clipping of characters, but in general the visuals are quite good. Now, the area’s you walk around in are quite detailed and look real. Apart from the invisible walls that is but hey, you need a way to keep the player in the correct playing area. 

In terms of animations, they are fine. All the animations of the characters that are standing still, I don’t have any complaints about them. I do have a complaint that there no walking animation of the characters. They magically teleport to the location you need them in, and they do that with a puff of smoke. At the other hand, it sort of grew on me and I felt that it added to the charm of the game. 

Like the reference achievements, those grew on me as well. It’s quite clear that the developers had a lot of fun putting these achievements together. And I think I might try to get all the achievements since it adds one more goal to this game. 

Now, let’s get on to the audiovisual presentation of this game. Let me start with the sound effects, these are good. I don’t have any complaints on that part. I do have some complaints about the soundtrack. While the soundtrack is good and fits the atmosphere of the game quite well, I feel that there aren’t enough music tracks. There are moments when the silence could have been filled with a bit of music. Then again, of most these moments where when I returned to the pawn shop or when I was loading in a map… So, does this game have enough music? I don’t know for sure. 

Let’s talk about the UI of this game. Overall, the UI is quite well done. Yet, I already mentioned one flaw with it. The fact that you can bind one key to more than one action. I’m sad to report that there is another flaw with the UI. I would be able to forgive the fact you can’t name your profiles, if you were able to disable the frame limiter… Which has been spelled with an underscore in the build I reviewed for some reason… 😉 But the most annoying mistake in terms of the UI is the controls bind menu… The controller lay-out, why don’t you use the XBOX or PS style buttons? Why the literal generic button lay-out? 

Before I talk about the final thing, I want to mention that there is no stamina meter in the game. So, when you are running and you want to know how long you still have before your character slows down, good look… 

Anyways, the final thing I want to talk about are the controls of the game. This is something that really confused me at first but as soon as I got used to them, they clicked quite well. Most of this game is controlled with the mouse and keyboard. A lot of actions are with the mouse, like interacting with objects and NPC’s. Very rarely I found myself using the wrong mouse button, but I was able to correct myself quite quickly. The controls are extremely responsive and I felt in complete control of my character. So, no complaints there.

So, I have played this game for about 4 hours now. While I found some small and big issues with the game, I still want to recommend this game to casual or adventure players who want to play something relaxing. This game is the perfect game to wind down after a long day of work. Maybe this might be just me but I find the gameplay loop quite rewarding.

While the game has some rough edges, the fact that there is an in-game feedback feature and the fact that there is a DLC coming next year is giving me hope that this game will become an even better game. Some of the issues that I mentioned in this article can be solved with in-game mechanics.

The game runs amazingly smooth and I never had any frame dips. The only minor issue I still want to mention is that I found it quite unclear when a character has finished his or her dialogue. But, that doesn’t stop me from recommend this game.

So yes, it would be a shame if you skipped this 20€ game since I enjoyed myself and I found the positives outweigh the negatives by a lot. And I think I have said everything I wanted to say about this game for now. I might take another look at this game when I beat it but for now, I want to thank you so much for reading my article and I hope you enjoyed reading it as much as I enjoyed writing it. I hope to be able to welcome you in another article but until then, have a great rest of your day and take care.